
Hip Arthroscopy Recovery: Timeline, Exercises, and Long-Term Results
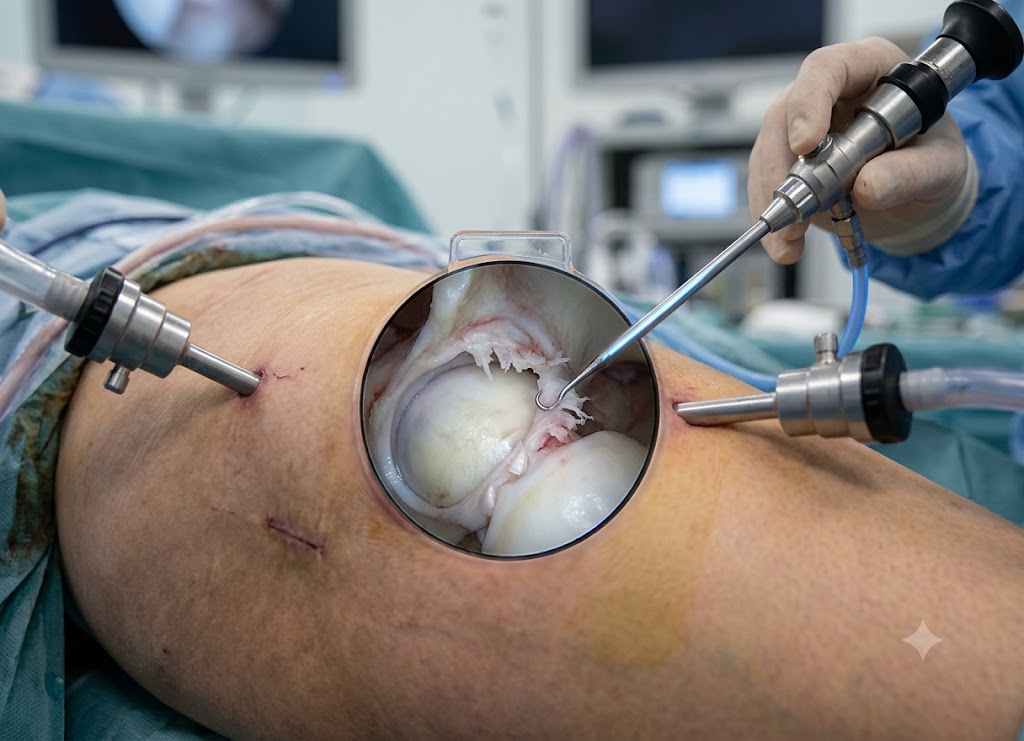
Hip arthroscopy is a minimally invasive procedure used to diagnose and treat several conditions affecting the hip joint. These can include labral tears, cartilage damage, femoroacetabular impingement (FAI), and loose fragments inside the joint.
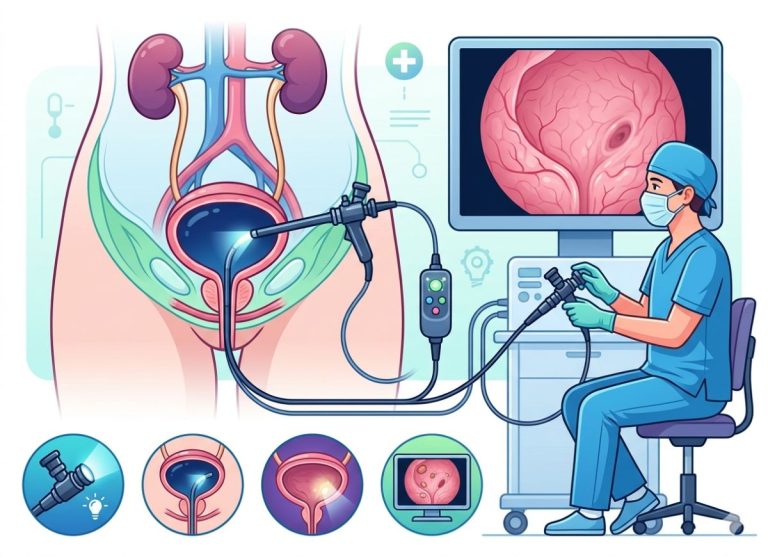
During the procedure, a surgeon uses a small camera called an arthroscope and specialized instruments inserted through tiny incisions. Compared with traditional open surgery, this approach generally involves smaller incisions and less disruption to surrounding tissues.
Knowing what to expect after hip arthroscopy can help patients understand the recovery process and prepare for each stage. Rehabilitation usually combines rest, physical therapy, gradual weight bearing, and a controlled return to everyday activities. The exact timeline depends on the procedure performed, the patient’s health, and how the individual responds to rehabilitation.
This guide explains the typical recovery stages, important exercises, key milestones, activity restrictions, and potential long-term results following hip arthroscopy.
What Is Hip Arthroscopy?
Hip arthroscopy is a minimally invasive surgical technique used to examine and treat problems inside the hip joint. The surgeon makes small incisions and inserts an arthroscope along with specialized instruments. The camera sends images to a monitor, allowing the surgeon to see the joint and address damaged structures.
The procedure may be used to treat conditions such as labral tears, femoroacetabular impingement (FAI), cartilage injuries, snapping hip syndrome, and loose bodies within the joint.
Because hip arthroscopy uses small surgical openings instead of a large incision, it can reduce disruption to surrounding tissues. The goal is to address the underlying joint problem while preserving as much healthy tissue as possible.
After surgery, patients typically follow a structured rehabilitation program. Physical therapy helps gradually restore hip movement, muscle strength, flexibility, balance, and normal daily function.
The Typical Hip Arthroscopy Recovery Timeline
Recovery after an orthopedic joint-preservation procedure generally follows several stages. Hip arthroscopy is a type of minimally invasive hip surgery that uses small portals to address problems inside the joint, such as labral injuries or bone abnormalities.
The recovery process needs to be gradual because the external incisions may heal faster than the deeper tissues. Following the rehabilitation plan helps protect the repair while allowing strength and movement to return.
The Phased Recovery Timeline
[Day 0 - 2]: Acute Protection → [Weeks 1 - 4]: Early Healing → [Months 1 - 3]: Progression → [Months 3 - 6+]: Full Return
1. The First 48 Hours: Acute Post-Operative Protection
The first couple of days are mainly focused on controlling discomfort and swelling while protecting the newly treated hip.
PACU and Initial Management: After hip arthroscopy, you will usually spend some time in the post-anesthesia care unit (PACU) while recovering from anesthesia. Depending on the procedure, a nerve block may provide temporary pain relief. Your medical team will also provide instructions for using prescribed pain medication safely.
Cryotherapy: Cold therapy is often recommended to help manage postoperative swelling and discomfort. Your surgical team will explain how frequently to use ice or another approved cooling method and how long each session should last.
Strict Weight Restrictions: Crutches are commonly used during the early recovery period. Depending on the procedure, your surgeon may recommend toe-touch, foot-flat, partial, or another form of protected weight bearing. Follow the specific weight-bearing instructions provided by your care team because restrictions vary between procedures.
2. Weeks 1 to 4: Early Healing and Joint Protection
During the first several weeks, the priority is to protect the surgical repair while introducing carefully controlled movement.
Incision and Wound Integrity: Small arthroscopy incisions are usually covered with dressings or sterile strips. Keep the surgical sites clean and follow your surgeon’s instructions for showering, dressing changes, and wound care. Report signs of infection or unusual drainage to your medical team.
Passive Range of Motion (PROM): Physical therapy may begin during the early postoperative period. Initially, the therapist may focus on gentle passive movements, allowing the hip to move within the range approved by your surgeon.
This controlled motion can help maintain mobility while avoiding unnecessary stress on healing tissues.
Activity Limits: Sitting for long periods may be uncomfortable during early recovery. Changing positions regularly and avoiding excessive hip flexion may be recommended. Short, appropriate periods of movement can also help maintain circulation. Driving should only resume when your surgeon confirms that it is safe and you can operate the vehicle without restrictions from medication or limited movement.
3. Months 1 to 3: The Weight-Bearing Transition
This stage usually focuses on gradually increasing weight bearing, improving walking mechanics, and developing foundational strength.
1. Progressive Partial Weight-Bearing: Weeks 4–6.
When cleared by your surgeon, gradually increase the amount of weight placed through the operated leg. Progression should be based on healing and physical therapy findings rather than the calendar alone.
2. Weaning to a Single Crutch: Weeks 5–7.
Some patients may transition from two crutches to one as strength and walking control improve. When one crutch is used, it is generally held in the hand opposite the operated hip, unless your therapist recommends another technique.
3. Unassisted Symmetrical Walking: Weeks 6–8.
The final crutch should only be removed once you can walk safely with a normal gait and without significant limping. Your physical therapist can assess your walking pattern before you stop using the assistive device.
Why a smooth gait matters: A persistent limp can place additional stress on the pelvis, lower back, and surrounding hip muscles. Correcting abnormal walking mechanics can help reduce unnecessary strain during recovery.
- Active Physical Therapy: As weight bearing improves, rehabilitation can progress toward active exercises. Depending on the procedure and recovery stage, this may include gentle squats, glute bridges, clamshells, and low-resistance stationary cycling to rebuild strength in the hips, glutes, quadriceps, and core.
- Low-Impact Daily Living: Later in this stage, some patients may gradually return to low-impact activities such as swimming or using an elliptical machine when cleared by their rehabilitation team.
4. Beyond 3 Months: Advanced Conditioning and Return to Activity
The later stage of rehabilitation focuses on moving from everyday activities toward more demanding exercise and sports.
Proprioception and Agility Training: Balance exercises may progress to single-leg activities and controlled movements that challenge hip stability. Training on appropriately challenging surfaces can improve proprioception, which is the body’s ability to sense joint position and coordinate movement.
Sport-Specific Performance: Athletes typically follow an individualized return-to-sport program. Runners may begin with a gradual walk-to-run progression, while field athletes may eventually work on controlled cutting, pivoting, jumping, and acceleration drills.
Full Clearance: Returning to unrestricted sports or heavy lifting can take several months and varies by procedure and individual recovery. Clearance should come from the surgeon and physical therapist after appropriate strength, movement, and functional testing.
Milestone and Restriction Matrix
| Recovery Stage | Weight-Bearing Status | Core Therapeutic Target | Primary Activity Restrictions |
|---|---|---|---|
| 0 to 48 Hours | Protected weight bearing, often with crutches | Managing early discomfort and protecting the surgical repair | No unassisted walking; avoid excessive hip bending |
| Weeks 1 to 4 | Foot-flat or other protected weight bearing as prescribed | Maintaining safe mobility and reducing stiffness | Follow driving restrictions; avoid prolonged sitting |
| Months 1 to 3 | Gradual progression toward full weight bearing | Improving gait, movement, and basic strength | No running, jumping, or heavy lifting unless cleared |
| Months 3 to 6+ | Progression toward unrestricted loading when appropriate | Developing advanced balance, agility, and sport-specific strength | Avoid high-demand sports until functional testing is passed |
Key Milestones in Hip Arthroscopy Recovery
Progress after hip arthroscopy should be measured by functional improvements rather than simply counting weeks. Although the small external incisions may heal relatively quickly, deeper tissues often need more time before they can tolerate increased loads.
Functional milestones help your healthcare team decide when it is appropriate to progress from one stage of rehabilitation to the next.
Initial 2 Weeks: Acute Stabilization Targets
The first two weeks generally focus on protecting the surgical site, controlling postoperative symptoms, and safely managing basic activities at home.
[Day 0] → Reduce Reliance on Strong Pain Medication → Independent Home Transfers → Effective Quad/Glute Activation
Systemic Pain Weaning: As recovery progresses, many patients gradually need less prescription pain medication. The timing varies, and medications should be reduced or changed only according to instructions from the treating clinician.
Independent Transfer Mechanics: Being able to safely get in and out of bed, sit down, stand up, and use the bathroom while following your weight-bearing restrictions is an important early goal.
Muscle Activation Mastery: Early rehabilitation may include ankle pumps, quadriceps sets, and gluteal contractions. These exercises help maintain circulation and muscle activation while limiting unnecessary movement of the healing hip.
Weeks 4 to 8: Safely Discarding Your Crutches
Stopping the use of crutches should be based on function rather than a specific date. Before walking without assistance, you should be able to support your body weight and maintain good movement mechanics as directed by your rehabilitation team.
Three important areas are:
Pain-Free Axial Loading: You should be able to gradually place more weight through the operated leg without significant pain or other concerning symptoms.
Symmetrical Gait (Zero Limping): Your physical therapist can assess your walking pattern, including step length, pelvic position, and weight distribution. If weakness causes the pelvis to drop or produces a Trendelenburg gait, continued assistance may be necessary.
Static Neuromuscular Balance: You should develop enough control to stand and move safely on the operated side without excessive leaning or loss of balance.
Month 3: Mobility and Endurance Benchmarks
Around the third month, rehabilitation often shifts toward improving range of motion, endurance, strength, and movement quality.
Symmetrical Passive Range of Motion (ROM): Your therapist may measure hip flexibility and compare it with the other side. The desired range depends on the procedure and individual recovery, so your rehabilitation team should determine the appropriate target.
Continuous Low-Impact Endurance: Being able to use a stationary bicycle comfortably for an extended period can demonstrate improved tolerance for repetitive, low-impact activity. The duration and resistance should increase gradually.
Symmetrical Weight Shifting: Balance exercises and controlled bodyweight movements can help determine whether you are distributing weight evenly and maintaining proper alignment.
Months 4 to 6+: Return-to-Sport Readiness
Returning to running, jumping, or competitive sports is one of the final stages of hip arthroscopy rehabilitation. It requires more than simply reaching a certain number of months after surgery.
[Month 4+] Restore Strength → Pass Functional Testing → Complete Sport-Specific Drills → Full Clearance
Symmetrical Power Metrics: Strength testing may compare the operated leg with the uninjured side. A target such as 90% strength symmetry may be used by some rehabilitation programs, but the appropriate standard depends on the individual and the sport.
Dynamic Functional Testing: Depending on your sport, testing may include controlled squats, hopping, jumping, balance tasks, and agility exercises. These assessments help determine whether the hip can tolerate progressively greater demands.
Completion of a Progressive Return-to-Sport Program: Athletes should gradually rebuild their activity level. Runners may progress from walking to jogging and then running, while field athletes may eventually add controlled changes of direction, kicking, acceleration, and jumping. The goal is to complete each stage without significant pain or other signs of overload.
Rehabilitation Milestone Matrix
| Recovery Timeline | Measurable Objective Milestone | Why This Specific Target Matters | Next Phase Unlocked |
|---|---|---|---|
| Weeks 1 to 2 | • Reduced need for strong pain medication• Independent home transfers• Consistent quad/glute activation | Shows improved control of early symptoms and safe basic movement. | Progression of supervised physical therapy. |
| Weeks 4 to 8 | • Increased weight bearing without significant pain• Level pelvis during walking• No significant Trendelenburg limp | Supports safer walking mechanics and reduces compensatory strain. | Progression toward unassisted walking and low-impact activities. |
| Month 3 | • Improved hip flexion and ROM• Extended stationary cycling• 30-second single-leg balance when appropriate | Demonstrates improved mobility, endurance, and movement control. | Advanced balance and conditioning exercises. |
| Months 4 to 6+ | • Strength approaching the uninjured side• Successful functional testing• Completion of sport-specific drills | Helps demonstrate readiness for higher-impact and more complex movements. | Return to sports or demanding training after professional clearance. |
Essential Exercises for Hip Arthroscopy Recovery
Understanding the exercises used during each stage can make the rehabilitation process easier to follow. Hip arthroscopy may use small incisions, but the deeper tissues treated during surgery still require time to heal.
The skin wounds may appear improved before the internal structures are ready for heavier activity. For this reason, exercises should progress gradually and according to the specific instructions provided by your surgeon and physical therapist.
Phase 1 (Weeks 0 to 4): Protective Activation and Restoring Cell Communication
The first month focuses on protecting the surgical repair while gently restoring muscle activation and controlled movement.
After surgery, muscles around the hip may become weaker or less active because of pain, swelling, and the body’s response to the procedure. Early exercises are therefore designed to encourage activation without placing excessive stress on the healing joint.
Ankle pumps are often among the simplest early movements. While lying comfortably on your back, point your toes away from your body and then pull them toward your shins. These movements encourage lower-leg muscle activity and can support circulation while mobility is limited.
Your rehabilitation program may also include isometric exercises such as quad sets and glute squeezes. For quad sets, keep the leg supported and gently tighten the muscles at the front of the thigh. Hold the contraction briefly and then relax.
For glute squeezes, gently contract the buttock muscles, hold, and release. These exercises allow you to activate muscles without significant joint movement.
Controlled heel slides may also be introduced to restore gentle hip and knee movement. While lying on your back, slowly slide your heel toward your body within the range approved by your therapist.
Do not force the movement or push through significant pain. If you experience a deep pinching sensation, increasing pain, or another concerning symptom, stop the exercise and contact your healthcare team.
Phase 2 (Weeks 4 to 12): Functional Strength and Rebuilding a Normal Walk
As healing progresses, physical therapy generally becomes more active. The focus shifts toward strengthening the muscles responsible for hip stability and improving walking mechanics.
Stationary cycling with little or no resistance may be introduced when appropriate. Start with a comfortable duration and gradually increase the time as recommended by your therapist.
Cycling provides controlled movement while placing less impact on the joint than activities such as running or jumping.
The gluteus medius is another important focus during this stage because it contributes to pelvic stability while walking and standing on one leg.
A common exercise is the side-lying clamshell. Lie on your side with your knees bent and feet together. Slowly raise the upper knee while keeping your feet in contact, then return to the starting position with control.
Glute bridges can also help strengthen the muscles around the hips and back of the legs. Lie on your back with your knees bent and feet supported. Tighten your glutes and slowly lift your pelvis, then lower it under control.
Your therapist can adjust the repetitions, range of motion, and difficulty of these exercises according to your recovery.
Phase 3 (Month 3 and Beyond): Advanced Conditioning and Shock Absorption
Later rehabilitation focuses on preparing the hip for more demanding movements and activities.
Strength exercises may eventually include movements such as goblet squats and lateral lunges. These exercises train the hips, knees, and ankles to work together while handling resistance.
Maintaining proper alignment is important. Your therapist may begin with bodyweight movements and gradually add resistance as your strength improves.
Single-leg stability and proprioception exercises can further improve balance and coordination. You may start by standing on the operated leg on a stable surface before progressing to more challenging exercises if your therapist approves.
These activities require the muscles around the hip to react quickly and help maintain joint control.
Plyometric and agility exercises are generally introduced later and only when adequate strength and control have been achieved. Early drills may focus on controlled two-leg landings before progressing to hopping, lateral movements, and running patterns.
The progression should be gradual so the hip is given enough time to adapt to increasing athletic demands.
Critical Movements to Avoid to Protect Your Joint Preservation
When learning about what is minimally invasive hip surgery, it is important to understand that protecting the healing joint is just as important as completing your exercises.
The restrictions below may apply during certain stages of recovery, but the exact rules vary depending on the procedure. Always follow your surgeon’s specific instructions.
- Deep Flexion Past Ninety Degrees: Some patients are instructed to avoid bending the hip beyond approximately 90 degrees during the early recovery period. Deep squats and low seating can place additional stress on healing tissues.
- Prolonged Static Sitting: Sitting for long periods may increase stiffness and discomfort. Change positions regularly and follow your therapist’s guidance regarding appropriate sitting duration.
- Active Straight Leg Raises: Straight-leg raises may be restricted early after certain hip procedures because they can place substantial demand on the hip flexor muscles. Do not add this exercise until your rehabilitation team approves it.
- Pivoting on a Planted Foot: Forceful twisting while the foot remains planted can place rotational stress on the hip. During early recovery, move your feet when changing direction rather than twisting sharply through the operated hip.
Other important considerations for a successful recovery
Exercises and physical therapy are important, but successful recovery also involves symptom management, wound care, appropriate activity progression, and preparation before surgery.
Understanding what is minimally invasive hip surgery means recognizing that small skin incisions do not mean the deeper tissues immediately return to normal. Internal healing continues for much longer and requires appropriate protection.
1. Advanced Swelling and Symptom Control
Managing postoperative pain and swelling can make the recovery process more comfortable and may help you participate in physical therapy more effectively.
Continuous Cryotherapy: Cold therapy may be recommended after surgery to help manage swelling and discomfort. Some patients use continuous cryotherapy systems that circulate cooled water through a fitted wrap. Follow your medical team’s instructions regarding temperature, duration, and frequency.
Strategic Elevation Mechanics: Elevating the leg may help manage swelling. Your healthcare team can demonstrate a comfortable position that supports the leg without placing unnecessary pressure on the healing hip.
Seated Joint Unloading: Choose a supportive seat and avoid positions that place the hip into excessive flexion. Keeping the hips appropriately positioned relative to the knees may make sitting more comfortable during recovery.
2. Vigilance for Post-Surgical Red Flags
Hip arthroscopy is generally considered a safe procedure, but complications can occur. Recognizing unusual symptoms and reporting them promptly is important.
Incision Site Infections: Some mild redness or tenderness can occur around healing incisions. Contact your surgical team if redness spreads, the area becomes increasingly warm or painful, drainage develops, or you develop a fever.
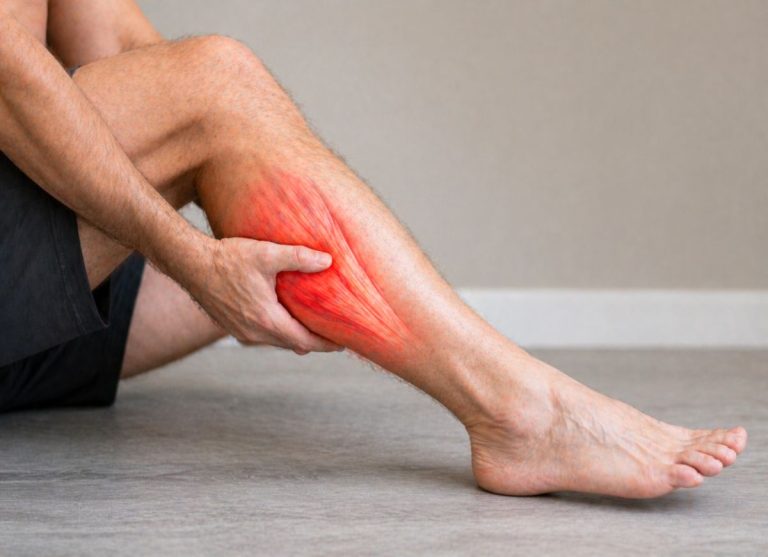
Deep Vein Thrombosis (DVT): Reduced mobility after surgery can increase the risk of blood clots. New or significant swelling, warmth, tenderness, or pain in one calf or thigh should be evaluated promptly.
If possible blood-clot symptoms occur together with sudden shortness of breath, chest pain, or difficulty breathing, seek emergency medical care immediately.
Atypical Nerve Symptoms: Temporary numbness around the surgical portals can occur. However, persistent or worsening numbness, significant burning or tingling, or sudden weakness in the foot or ankle should be reported to your healthcare provider.
3. Preserving vs. Replacing: A Biomechanical Distinction
Patients sometimes compare hip arthroscopy with total hip replacement. When considering what is minimally invasive hip surgery, it is helpful to understand that the two procedures have different purposes.
Surgical Scope and Invasiveness: Total hip replacement replaces damaged portions of the hip joint with artificial components. Hip arthroscopy uses small portals and specialized instruments to treat selected problems while preserving the natural joint whenever possible.
Patient Profiles and Long-Term Goals: Total hip replacement is commonly performed for advanced joint degeneration and severe arthritis. Hip arthroscopy may be appropriate for selected patients with conditions such as labral tears, femoroacetabular impingement, or other localized hip problems.
Lifelong Activity Boundaries: Activity recommendations after hip replacement vary by patient and procedure. Following successful hip arthroscopy and rehabilitation, some patients may return to demanding activities, including running or sports, when their surgeon and rehabilitation team determine that it is appropriate.
4. Maximizing Success Through Prehabilitation (Prehab)
Prehabilitation, often called prehab, involves preparing for surgery through appropriate exercises and education before the procedure. Working with a physical therapist beforehand can help patients understand the movements and skills they may need during recovery.
Pre-Surgical Neuromuscular Wiring: Prehab may allow you to practice exercises such as glute bridges and clamshells before surgery. Familiarity with these movements can make it easier to perform them correctly during postoperative rehabilitation.
Proactive Crutch Coordination: Learning how to use crutches, move around the home, and manage stairs before surgery can make the early recovery period easier. Practicing these skills in advance may also improve confidence and safety.
Systemic Tissue Preparation: Preparing your overall health before surgery is also important. A balanced diet containing adequate protein and a variety of nutrient-rich foods can support normal healing. If you use tobacco or nicotine, discuss stopping with your healthcare provider, as nicotine can interfere with circulation and wound healing.
Conclusion
Hip arthroscopy is a minimally invasive option for treating several hip joint conditions while preserving the natural joint whenever appropriate. Recovery usually involves a gradual rehabilitation program focused on restoring movement, rebuilding strength, improving balance, and returning safely to normal activities.
The recovery timeline differs from one patient to another based on the procedure performed, the extent of the repair, overall health, and progress during rehabilitation.
Following your surgeon’s instructions, attending physical therapy, progressing activities carefully, and reporting unusual symptoms can all support a successful recovery. With appropriate treatment and rehabilitation, many patients experience improved hip function, reduced pain, and better quality of life.
Frequently Asked Questions
1. What is hip arthroscopy?
Hip arthroscopy is a minimally invasive procedure in which a small camera and specialized surgical instruments are inserted into the hip joint through tiny incisions.
It can be used to diagnose and treat conditions such as labral tears, cartilage damage, femoroacetabular impingement, and loose bodies. The procedure allows surgeons to address certain problems while limiting disruption to surrounding tissues.
2. How long does recovery take after hip arthroscopy?
Recovery time depends on the specific procedure, the extent of tissue repair, and the individual’s healing process.
Some patients begin partial weight bearing with crutches soon after surgery, while returning to regular daily activities may take several weeks. More demanding activities, sports, and heavy lifting can require several months of progressive rehabilitation.
Your surgeon and physical therapist will determine when it is safe to advance from one stage to the next.
3. What exercises are recommended after hip arthroscopy?
Early rehabilitation may include gentle range-of-motion exercises and muscle activation movements. As recovery progresses, therapy may include stationary cycling, glute and hip strengthening, resistance exercises, balance training, and eventually sport-specific activities.
Exercises should be introduced gradually and follow the rehabilitation plan created for your particular procedure.
4. What are common symptoms during recovery?
Common postoperative symptoms can include discomfort, swelling, stiffness, bruising, and temporary changes in walking.
These symptoms generally improve as healing progresses. Your care team may recommend pain management, cold therapy, rest, and physical therapy. Severe, unusual, or worsening symptoms should be discussed with your healthcare provider.
5. Are there risks or complications from hip arthroscopy?
Like other surgical procedures, hip arthroscopy has potential risks. These can include infection, blood clots, nerve or blood-vessel injury, stiffness, persistent pain, or incomplete improvement.
Your surgeon should discuss the risks specific to your procedure and explain the steps you can take to support a safe recovery.
6. When can I return to sports or high-impact activities?
Returning to sports is usually based on recovery milestones rather than a specific date. Some patients may return to higher-impact activities several months after surgery, but the timeline depends on the procedure, healing progress, strength, flexibility, balance, and sport-specific demands.
Before returning to running, jumping, cutting, or competitive sports, you should meet the functional requirements set by your surgeon and physical therapist.
7. What are the long-term results of hip arthroscopy?
Many appropriately selected patients experience improvements in hip function, pain, mobility, and quality of life after hip arthroscopy.
Long-term results depend on factors such as the original hip condition, cartilage health, the procedure performed, and rehabilitation. Some patients may develop additional joint problems or require further treatment over time, so continued medical follow-up may be appropriate.