
How to Contour Like a Pro: A Complete Guide
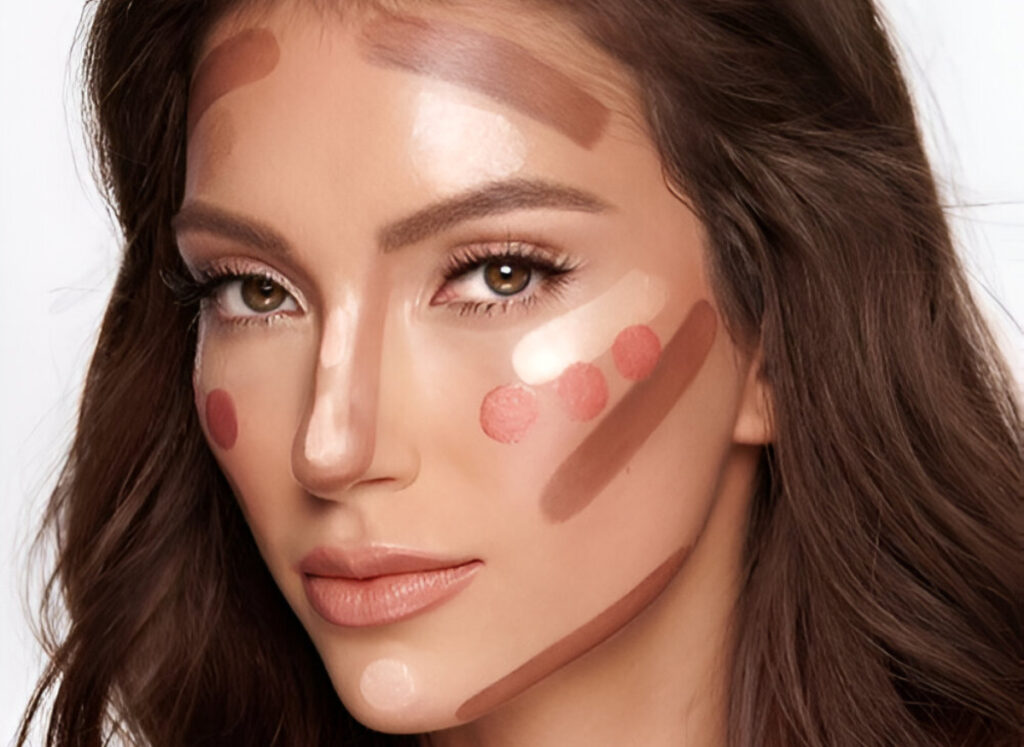
Contouring is no small thing. Anyone who’s serious about makeup knows how much the technique itself can make or break the final look.
Done well, contour elevates the whole face, bringing out your best features and adding real dimension. Done poorly, it can quickly turn into a mess nobody wants.
This guide covers exactly how to contour like a pro, so the technique works in your favor instead of against you.
Grab your contour product of choice, whether that’s a palette, stick, or cream, along with your brushes. Time to get into it.
How to Contour Your Face
Create your base
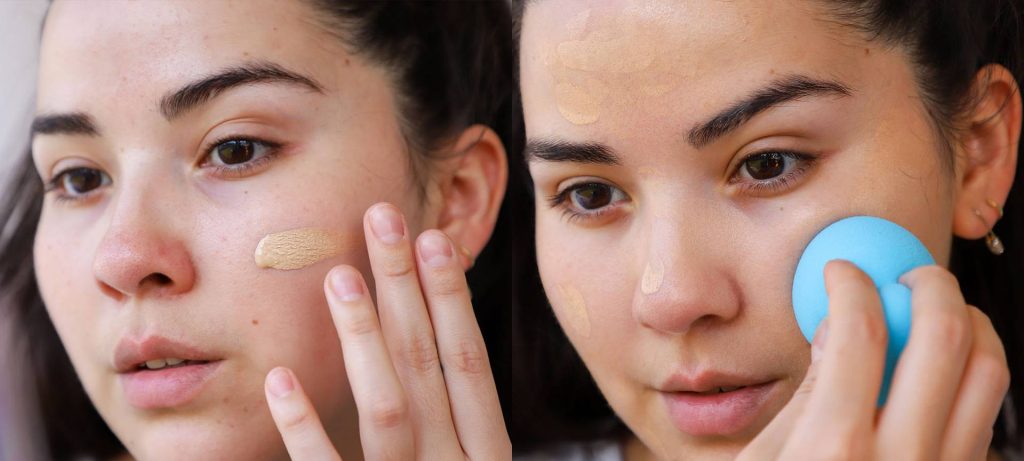
Before contour goes on, start with smooth foundation and concealer. A solid base helps everything else apply more evenly and blend smoothly.
If using a powder contour, a light layer of translucent powder over the base locks the foundation in place first.
Choose your product and brushes

Contour products generally fall into two categories: powders and creams. Cream formulas are easier to build and blend, making them a great starting point for beginners, and they tend to leave a dewy finish.
Powders lean more matte, giving that classic airbrushed effect.
Smaller, fluffy brushes offer more control and precision during application. Keep one brush dedicated to contour and a separate one for highlighter, mixing the two tends to muddy the whole look.
Map out your face
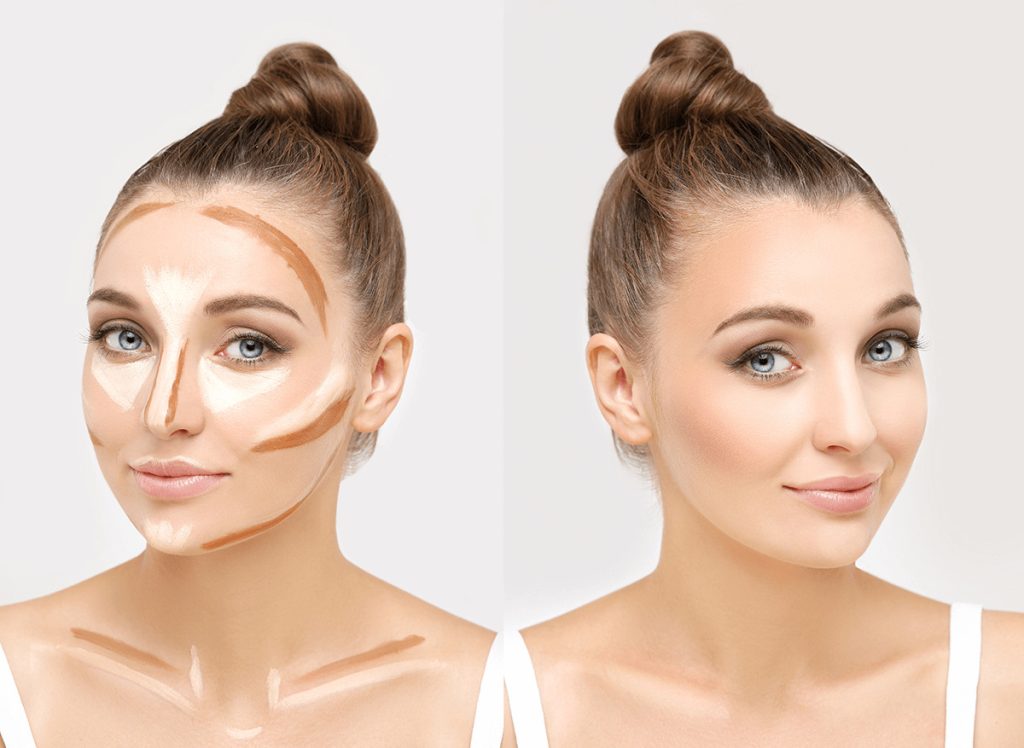
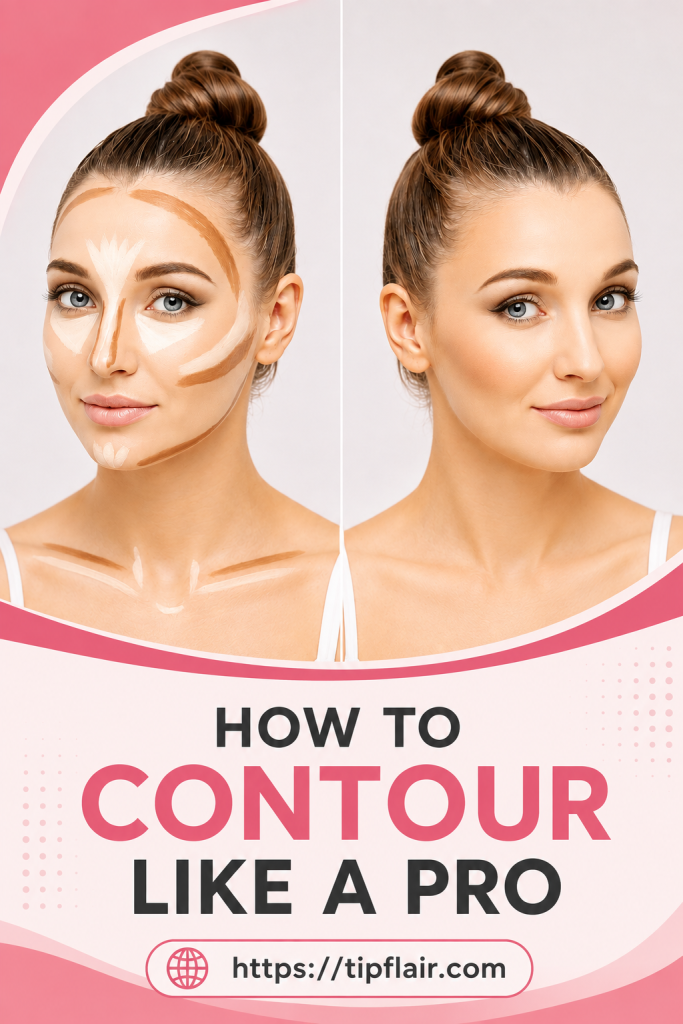
Focus on the areas under the jawline, the temples, the sides of the nose, and the cheekbones.
That said, every face shape is a little different, so use your own bone structure as the real guide. Start light and build up gradually, it’s much easier to add more than to take product away.
Build and blend
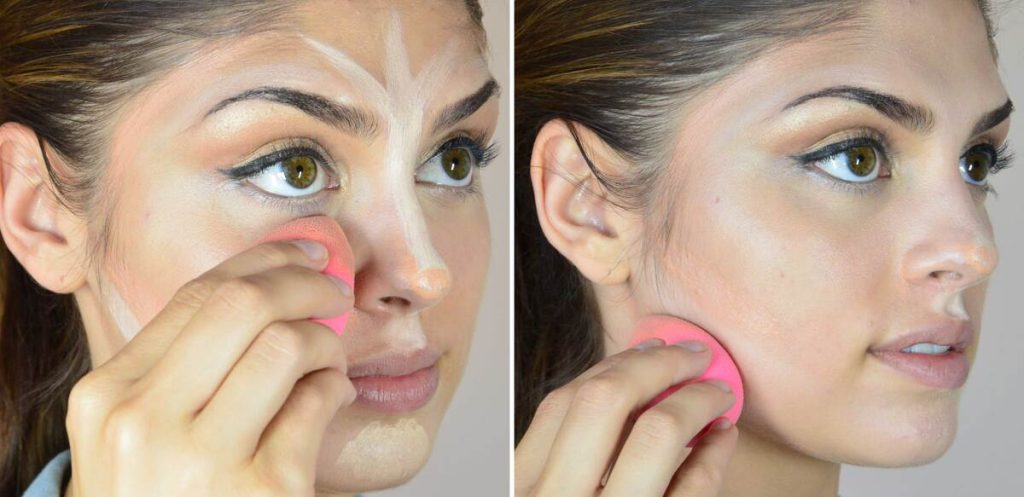
Sharp, obvious contour lines are never the goal, but neither is an over-blended, muddy finish.
Starting light and adding gradually makes blending far easier than trying to soften heavy lines after the fact.
A damp beauty sponge or foundation brush works well for smoothing everything out.
Highlight
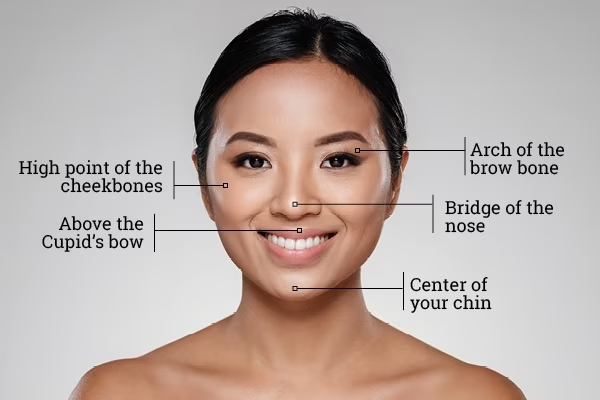
Apply highlighter only where light naturally hits: the cheekbones, brow bones, bridge of the nose, top of the cupid’s bow, and center of the chin.
This step enhances the contouring effect and adds the final touch of dimension.
Contouring by Face Shape
Heart-shaped face
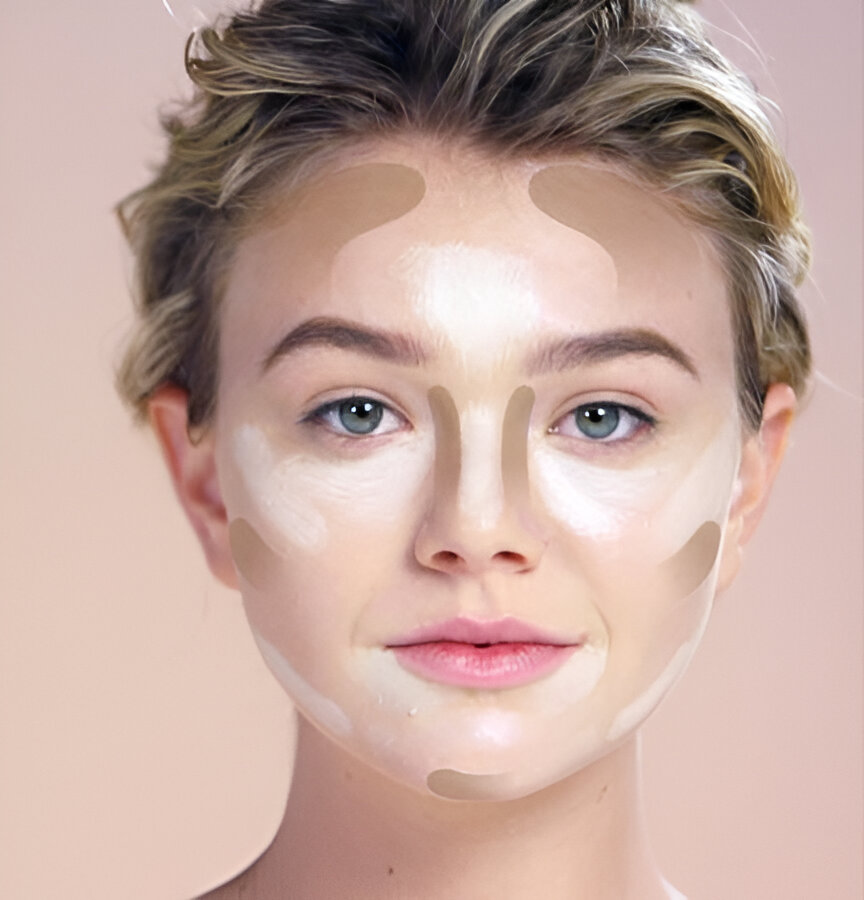
Highlight the jaw, nose bridge, under-eye area, tops of the cheeks, corners of the mouth, and center of the forehead using a cream highlighter or a concealer a shade lighter than your foundation.
Shade choice matters a lot here. Cooler undertones should avoid anything too warm or orange, while warmer undertones should skip shades that read ashy or gray.
Apply contour to the mapped areas, using a small, fluffy brush for the nose and a larger one elsewhere. Blend in an upward motion for a softer effect, using small dabbing motions rather than long strokes to keep the lines crisp instead of muddy.
Round face
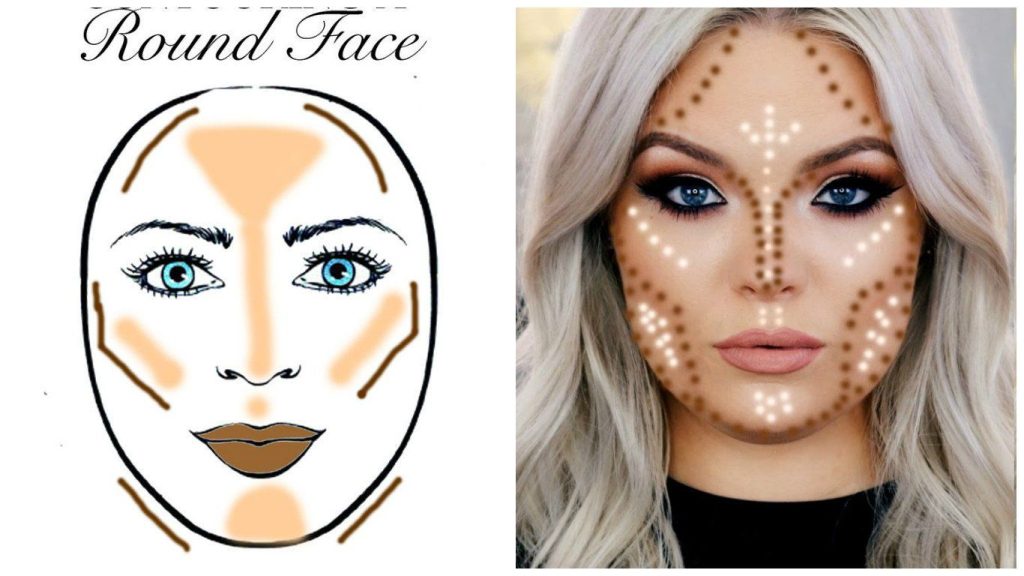
Start with foundation as a base. Highlight the center of the forehead, bridge of the nose, and center of the chin.
Draw long, inverted triangles beneath the eyes, and add highlighter to the cheekbones as well.
Starting from the ear, draw a line down along the jaw to slim the face, then add two C-shaped strokes to map out the temples.
Contour along the sides of the nose to elongate it. Blend the smaller details with a small fluffy brush, then use a larger brush for the rest until no harsh lines remain.
Square face
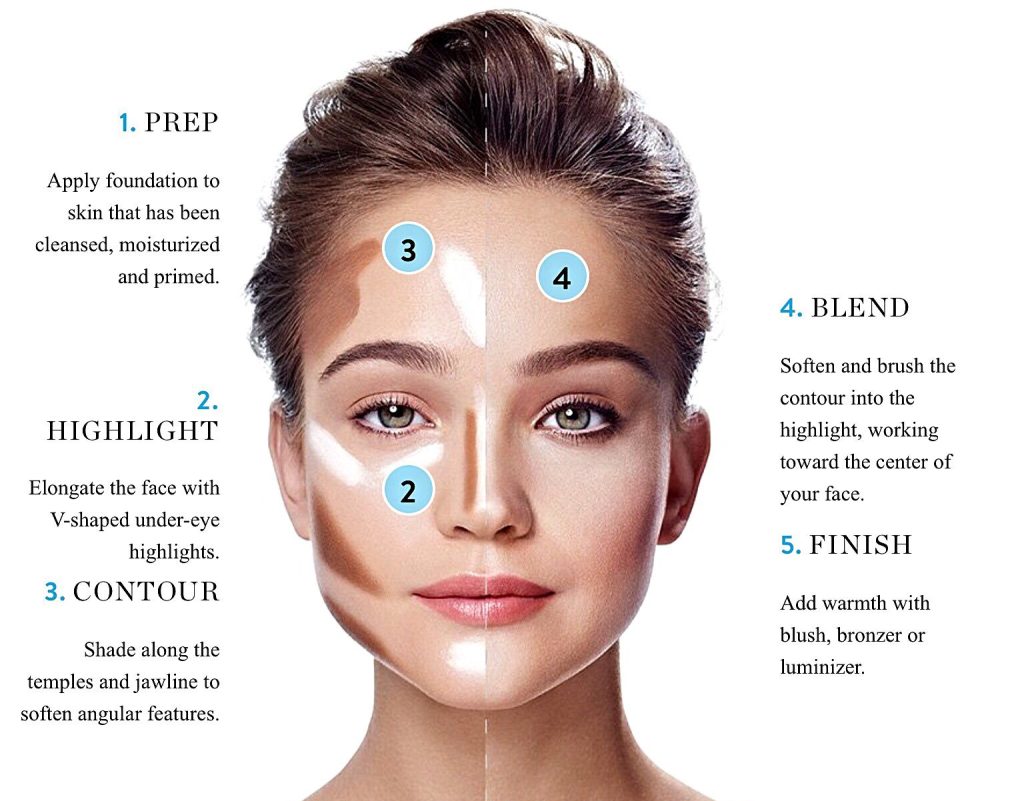
Highlight the center of the forehead, center of the chin, and bridge of the nose.
Create two small V shapes under the eyes, repeating the same shape at the outer corners of the mouth.
Focus contour along the jawline, beneath the cheekbones, and along the sides of the nose.
Blend the highlighted areas first, then use a larger brush to blend the contour into the highlight. Small dabbing motions tend to work best for beginners here too.
Oval and oblong face
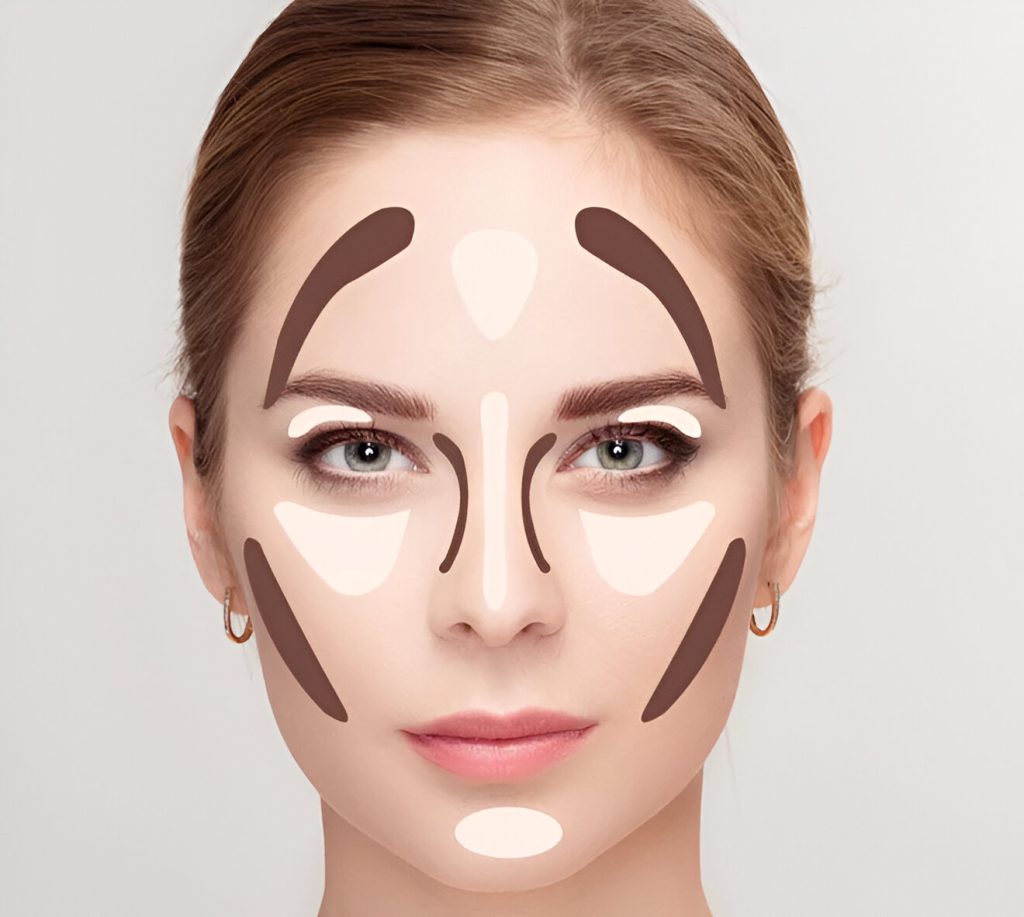
With a cream highlighter, draw an arch beneath the eyebrows, followed by a triangle at the center of the forehead.
Highlight the bridge of the nose, under-eye areas, and center of the chin.
Draw a diagonal contour line from the cheekbone down toward the corner of the mouth.
Contour the outer edges of the forehead and the sides of the nose, then blend everything with a fluffy brush.
Diamond-shaped face
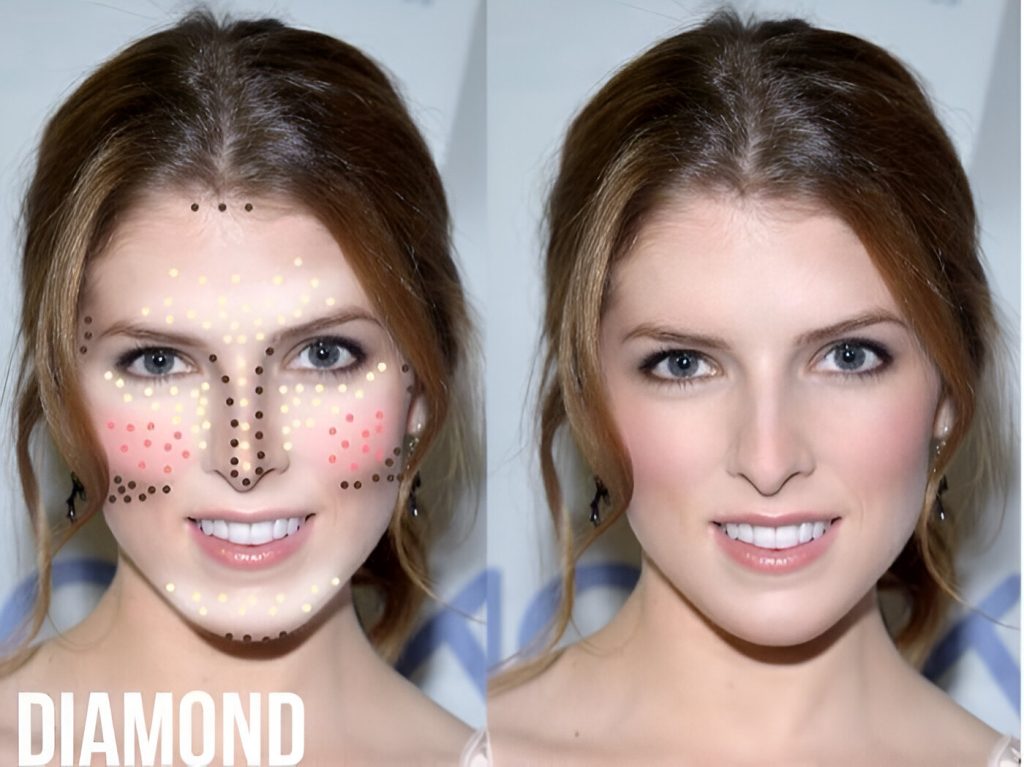
Bring out the under-eye area, the middle of the forehead, and the center of the chin using a cream highlighter or a light concealer to balance the features.
Contour beneath the cheekbones, starting near the ears and working toward the center of the cheeks.
Rectangle face
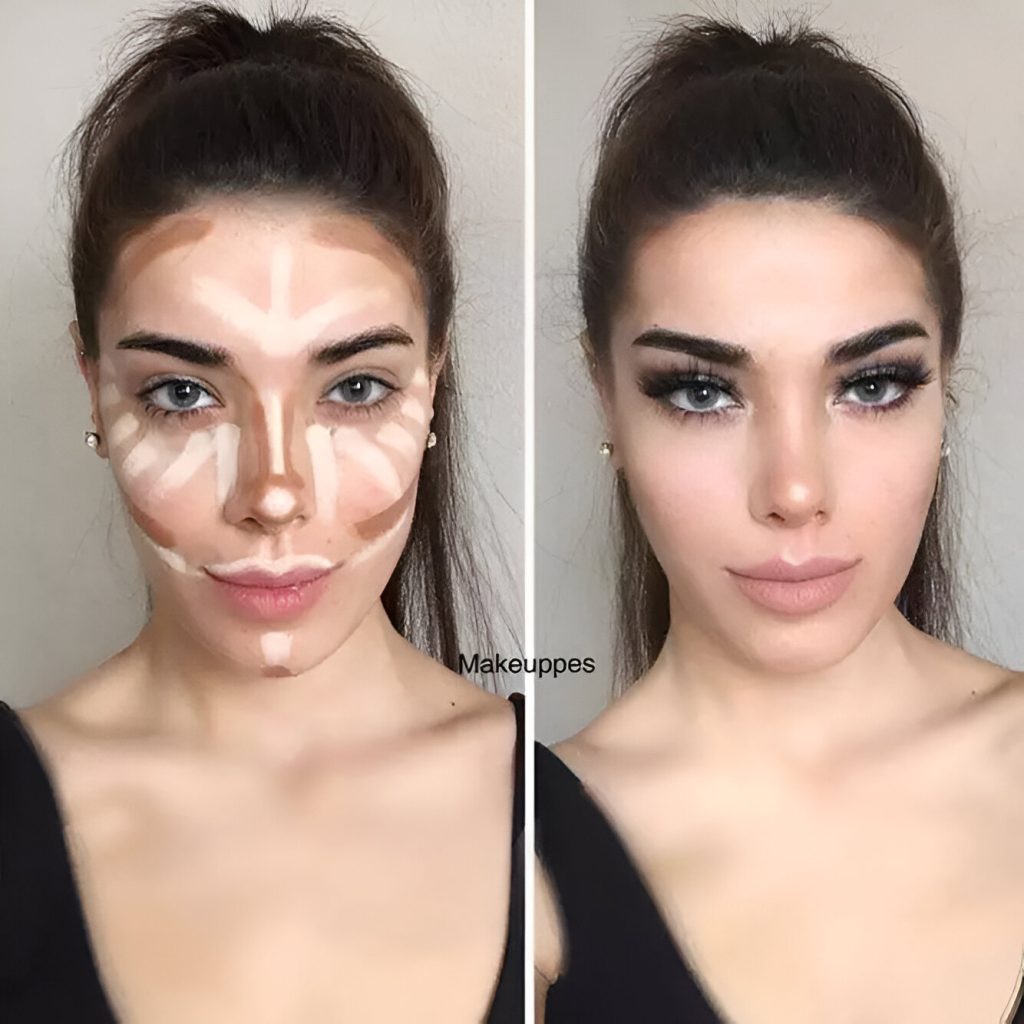
Highlight the under-eye area, the brow bone, and the middle of the chin.
For contour, focus on shaping the sides of the brow to visually narrow the hairline.
Also run contour along the hairline, under the jawline, and beneath the cheekbones, starting at the ears and ending toward the center of the cheeks.
Tips for the Perfect Contour
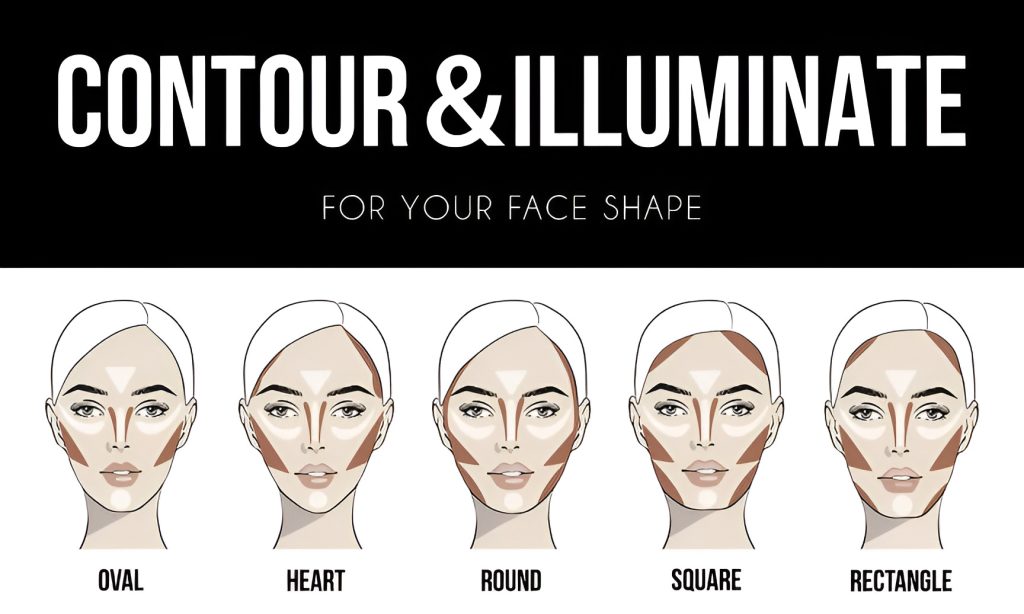
Understand your face shape first. Working with your own bone structure is the best way to get a natural-looking result.
Avoid contour products that read too orange or overly shimmery.
The handle of a makeup brush can double as a straightedge guide for keeping nose contour lines even.
Invest in good brushes and tools. Cheaper ones tend to absorb product rather than deposit it, leading to a muddier, less controlled application.
Contouring can feel intimidating at first, especially for beginners, but it gets much easier with repetition. The technique really does click faster than expected once you start practicing regularly.