
Knee Pain 101: Causes, Healing Phases, and Exercises for Lasting Joint Health
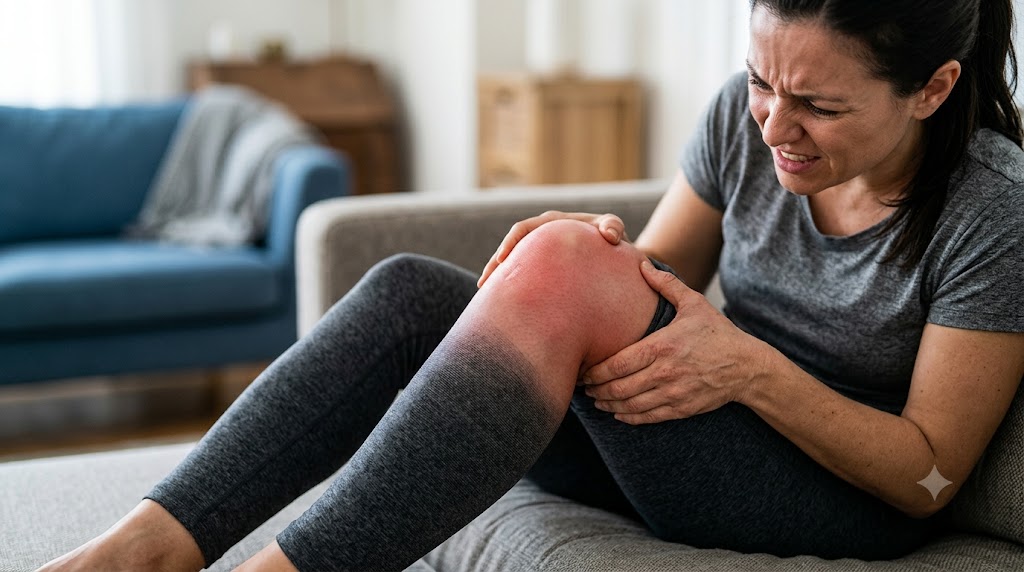
Knee pain touches almost everyone at some point young athletes, weekend runners, and older adults alike. It might show up after a bad landing on the court, creep in slowly after years of daily strain, or appear the morning after you pushed a run a little too far. Whatever the cause, a sore knee can make even simple tasks feel exhausting. Every time you walk, squat, or climb stairs, your knee absorbs forces up to five times your body weight, so keeping it healthy takes a deliberate, patient approach rather than guesswork.
This guide walks through how the knee is built, what typically causes it to hurt, a realistic recovery timeline, and exercises that will keep your joints strong for years to come.
What Is Knee Pain? Anatomy and Common Causes
Picture your knee as a finely built hinge joining three bones: the thighbone (femur), the shinbone (tibia), and the kneecap (patella). A smooth layer of cartilage coats the ends of these bones so they can move against each other without friction. Sitting between the thigh and shin bones are two crescent-shaped cushions, the menisci, which act as natural shock absorbers.
Four major ligaments act like reinforced cables holding the joint together, while tendons anchor your thigh muscles to the bone, giving you the power to walk, kick, and jump. Pain shows up whenever any of these structures gets overstretched, torn, or gradually worn down.
Primary Underlying Pathologies
Most knee pain traces back to one of three sources:
Sudden Injuries
A rough landing, a quick pivot, or a direct blow can stretch or tear a ligament such as the ACL. Twisting with your foot planted on the ground can also damage the meniscus, leading to sharp pain, swelling, or a knee that locks or catches when bent.
Overuse and Daily Wear
Repetitive motion running, jumping, or squatting again and again can inflame the tendon beneath the kneecap. A closely related issue, often called runner’s knee, happens when the kneecap drifts out of its groove and rubs against the bone underneath it.
Long-Term Joint Wear and Inflammation
As the years pass, protective cartilage inside the knee can gradually thin, a process known as osteoarthritis. It often brings a deep ache, stiffness, and a grinding sensation. In other cases, conditions like rheumatoid arthritis or gout trigger sudden, hot, painful swelling in the joint.
The Phased Knee Pain Recovery Timeline
Recovering a knee properly takes time and structure. Rush it, and you risk reinjuring the joint. Rest too long, though, and the surrounding muscles weaken and stiffen.
Acute Protection & Pain Control
Phase 1 (Days 0–14)
Goal: reduce swelling, protect the joint, and keep the thigh muscle engaged with light contractions.
Restoration of Motion & Early Stabilization
Phase 2 (Weeks 2–6)
Goal: regain full leg extension, walk without limping, and reintroduce gentle movement.
Progressive Load & Functional Strengthening
Phase 3 (Weeks 6–12)
Goal: rebuild leg and hip strength, sharpen balance, and manage everyday activities comfortably.
Advanced Conditioning & Return to Full Activity
Phase 4 (Months 3–6+) Goal: handle lateral movement, jogging, and sport-specific drills to safely resume full activity.

Detailed Phase Breakdown
Phase 1: Days 0 to 14 — Acute Protection & Pain Control
The first priority after an injury or flare-up is calming the knee down. Use crutches or a brace if you’re limping or wincing on the leg. Apply ice for 15–20 minutes every couple of hours, and elevate the leg above heart level to help fluid drain away. Even while resting, gently tighten your thigh muscle a few times a day so it doesn’t shut down completely.
Phase 2: Weeks 2 to 6 — Restoration of Motion & Early Stabilization
Once the sharpest pain has settled, work on restoring natural movement. Getting the knee to straighten fully is the priority here a knee that can’t fully extend forces you to limp and puts strain on your lower back. Practice a smooth heel-to-toe walking pattern, and only set the crutches aside once you can walk without a limp.
Phase 3: Weeks 6 to 12 — Progressive Load & Functional Strengthening
With swelling under control, shift toward rebuilding strength. Favor exercises that keep your foot planted, such as partial wall squats, leg presses, and step-ups these build strength while protecting the joint. Single-leg standing drills are also useful here to rebuild the small stabilizing muscles around the knee.
Phase 4: Months 3 to 6+ — Advanced Conditioning & Return to Activity
This final stage prepares the knee for real-world demands like running, jumping, and sudden changes in direction. Introduce light hopping and agility work gradually, and only once the injured leg has caught up in strength to the healthy one. If you notice new swelling the day after training, ease off and give the joint more time to adapt.
Key Functional Milestones in Recovery
Rather than counting weeks, judge your progress by what the knee can actually do. First, confirm the swelling is fully gone leftover fluid in the joint inhibits the thigh muscle from firing properly. Next, check that the knee straightens completely to match the other leg, which restores a normal heel-to-toe stride.
Before progressing to harder training, make sure you can raise a straight leg off the ground without the knee bending, confirming the thigh muscle is firing correctly. Watch your knee during squats or step-ups it should track straight over your toes rather than caving inward. Finally, the recovering leg should feel nearly as strong and stable as the healthy one before returning to sport.
Essential Rehabilitation & Exercise Protocols
A resilient knee depends on strong support from the surrounding muscles quadriceps in front, hamstrings behind, calves, and glutes at the hip. Weak hips in particular let the knee drift inward, adding extra stress to the joint.
Phase A: Early Restoration & Passive Mobilization
Quadriceps Sets
Sit with your leg extended and a rolled towel under the knee. Press the back of your knee down into the towel to engage your thigh muscle. Hold 5–10 seconds, 12–15 reps, twice daily.
Straight Leg Raises
Lie on your back with the healthy knee bent, foot flat on the floor. Keep the injured leg straight, tighten the thigh, and lift it about a foot off the ground. Pause, then lower slowly. 3 sets of 10–12 reps.
Heel Slides
Sitting with legs extended, loop a towel around your foot and gently slide your heel toward you, stopping at a light stretch. Hold 5 seconds, then slide back out. 2 sets of 15 reps.
Phase B: Mid-Stage Strength & Dynamic Stability
Wall Sits
Slide your back down a wall until your knees bend comfortably, keeping knees aligned over ankles. Hold 30–45 seconds, 3–4 rounds.
Glute Bridges
Lying on your back with knees bent, squeeze your glutes and lift your hips until your body forms a straight line from shoulders to knees. Lower slowly. 3 sets of 12–15 reps.
Side-Lying Clamshells
Lie on your side, knees bent, feet together. Lift the top knee upward without rotating your lower back. 3 sets of 15–20 reps per side.
Supported Step-Ups
Standing in front of a low step, place your injured foot on it, push through the heel to rise, then lower back down slowly over three seconds. 3 sets of 10–12 reps.
Phase C: Advanced Dynamic Load & Proprioception
Single-Leg Romanian Deadlifts
Standing on the affected leg with a soft knee bend, hinge forward at the hips while extending the other leg behind you. Keep your back flat, then squeeze your hip to return upright. 3 sets of 8–10 reps per side.
Bulgarian Split Squats
With the back foot elevated on a bench, lower the front knee to roughly 90 degrees, keeping it tracking over the toes, then push back up. 3 sets of 8–10 reps per leg.
Single-Leg Balance Practice
Stand on the recovering leg on an unstable surface like a folded towel, knee softly bent. Hold 30 seconds; add difficulty by turning your head or closing your eyes. 3 sets per side.
Important Safety Guidelines and Biomechanical Precautions
Pay close attention to how your knee responds during rehab. Avoid heavy leg extension machines early in recovery, since kicking against resistance from a bent knee puts intense strain on the kneecap and ligaments.
Watch your alignment carefully never let the knee collapse inward during squats or steps; keep it tracking in line with your toes.
Learn to distinguish muscle fatigue from joint pain. A warm, tired feeling in the thigh means you’re building strength, but sharp, pinching, or catching pain inside the joint is a signal to stop. And remember the 24-hour rule: if the knee feels more sore or swollen the day after training, scale back the next session.
Complementary Therapies, Lifestyle, and Medical Management
Exercise works best alongside smart daily habits and appropriate medical care.
Everyday Adjustments
Check your footwear worn soles or unsupportive shoes let your feet roll inward, twisting the knee with each step. Supportive inserts can help if you have flat feet. Avoid low, deep couches that force prolonged knee bending, and if you sleep on your side, place a pillow between your knees to keep hips and knees aligned. Managing your weight matters too, since every extra pound adds roughly four pounds of force through the knee with each step.
Medical and Treatment Options
If home care isn’t enough, a doctor can offer further options. Over-the-counter pain relievers or anti-inflammatory gels can help during flare-ups. Targeted injections corticosteroids for rapid swelling relief, or hyaluronic acid to lubricate an arthritic joint are another option. Platelet-rich plasma injections use components from your own blood to support healing.
When damage is more serious, surgery may be necessary. Arthroscopic surgery allows minimally invasive repair of torn meniscus tissue. Torn ligaments can be reconstructed with tissue grafts, and severe arthritis may be treated with joint replacement using artificial implants.
Red Flags: When to Seek Immediate Medical Evaluation
Some symptoms call for urgent medical attention:
- You can’t bear any weight on the leg or take a few steps without the knee giving out.
- The knee is locked in a bent position and won’t straighten.
- The joint becomes hot, red, and heavily swollen, especially with fever a possible sign of infection.
- You notice significant swelling, warmth, or deep pain in the calf behind the injured knee a possible sign of a blood clot.
Long-Term Joint Preservation Strategies
Once your knee feels strong again, a few habits will help protect it long-term. Keep your legs strong with squats, bridges, and step-ups two to three times a week. Balance high-impact activities like running with lower-impact options such as cycling, swimming, or the elliptical, which nourish the cartilage without repeated pounding.
Don’t ignore small warning signs if your knee feels unusually stiff after an active weekend, give it a couple of easy days before ramping back up.
Frequently Asked Questions
Is walking good for knee pain?
For most people with mild stiffness or arthritis, walking helps circulate nourishing fluid through the joint. If it causes sharp pain or a limp, shorten your distance, walk on softer surfaces, or switch to cycling until it calms down.
Should I use ice or heat on my knee?
Ice suits fresh injuries, new swelling, or post-workout soreness. Heat is better for stiff, aching muscles or warming up before stretching and exercise.
How do I know if it’s a torn meniscus or just a strain?
A simple strain feels like a dull muscle ache that improves steadily over a few days. A meniscus tear usually follows a twisting movement and brings deep pain along the joint line, delayed swelling, and mechanical symptoms like clicking or catching.
Is running bad for my knees long-term?
No research shows recreational running doesn’t inherently cause arthritis, and moderate running can actually strengthen joint tissue. Problems tend to come from poor form, weak hips, worn shoes, or ignoring pain.
How long does knee pain take to go away?
Mild strains often resolve in 2–4 weeks with basic care. Moderate sprains or meniscus issues typically need 6–12 weeks of rehab. Major surgeries like ACL reconstruction require 6–9 months or more of dedicated physical therapy.
Conclusion
Healing a knee rarely happens overnight, but a steady, phased approach lets the joint come back stronger and more resilient. Respecting each recovery stage, focusing on proper movement, and steadily rebuilding the muscles around the joint gives your body what it needs to fully recover.
Joint health isn’t a one-time fix it’s an ongoing habit. Staying active, favoring low-impact movement, and listening to your body’s early signals will keep you moving comfortably for years to come.
Medical Disclaimer
This article is for educational purposes only and is not medical advice, diagnosis, or treatment. Always consult a qualified healthcare professional, such as an orthopedic physician or physical therapist, before starting any exercise program or making decisions about your joint health. Never delay seeking professional care because of something read here.