

How to Use a Cane Safely
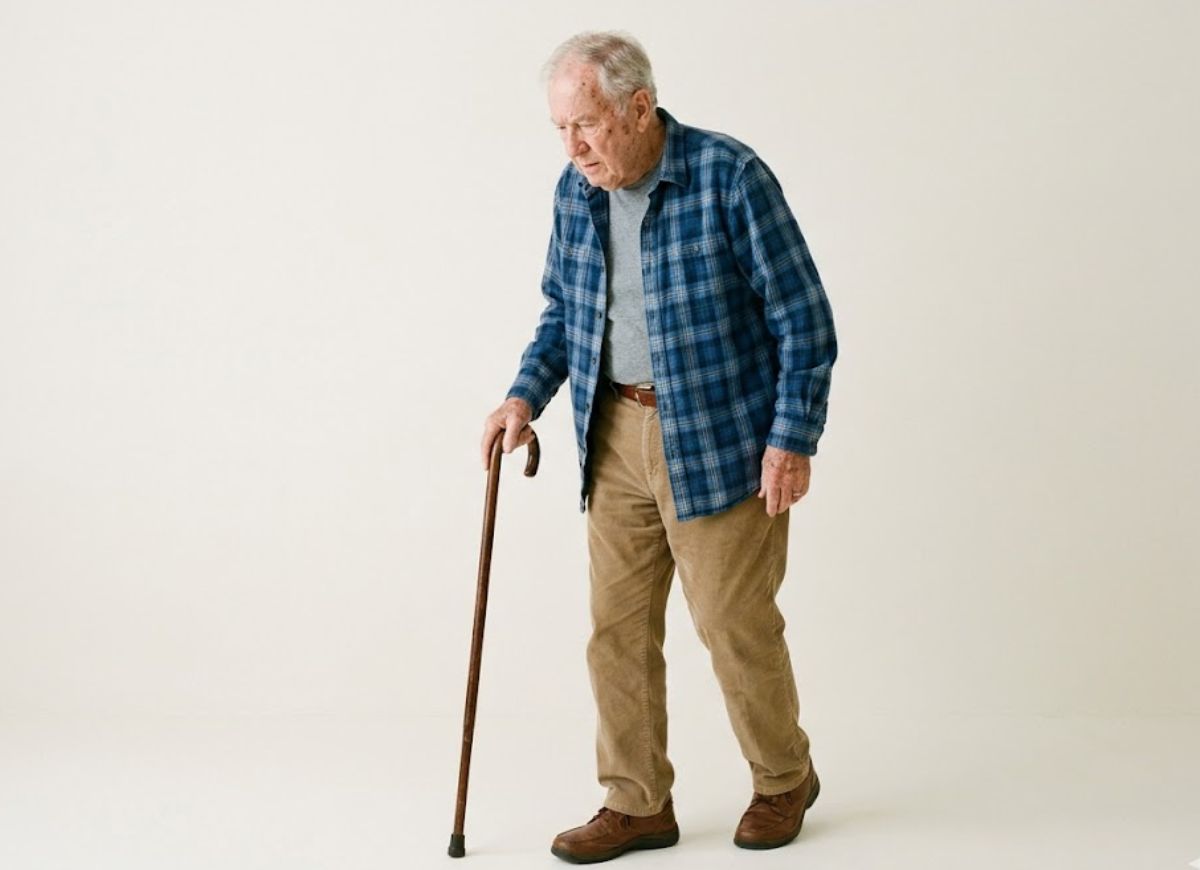
Realizing that you or someone close to you needs a walking cane can bring up a range of emotions. For some people, using a cane for the first time may feel like an unwanted reminder of an injury, surgery, arthritis, balance difficulties, or the normal physical changes that can come with age. Feeling uncomfortable or self-conscious at first is completely understandable.
However, changing the way you view a cane can make a major difference. A cane is not simply a sign of physical limitation. When used correctly, it is a valuable mobility aid that can help protect your independence, improve stability, keep you moving, and reduce the chance of falls.
There is one important detail that many new cane users get wrong: walking with a cane is not completely intuitive. Incorrect technique may actually make walking less stable. Many people assume the cane should be held on the same side as the injured or weaker leg. In most situations, the opposite is true. Holding the cane on the stronger side works with the body’s natural walking pattern and helps transfer some of the load away from the weaker leg.
Proper cane use also depends on choosing the correct height. A poorly adjusted cane can place unnecessary stress on your wrist, shoulder, neck, or back. Below, you’ll learn how to select the right cane, adjust its height, walk with it properly, and handle everyday challenges such as stairs, curbs, rugs, and other obstacles.
What Is the Correct Way to Choose a Cane for Your Needs?
Choosing the right cane involves three main considerations: finding the correct height, selecting a cane style that matches your stability needs, and choosing a handle that feels comfortable and secure in your hand.
A cane that does not fit your body or match your mobility needs may create additional problems instead of providing useful support. It can affect your posture, increase muscle strain, and make walking less secure. Selecting the appropriate cane should therefore be the starting point for safe mobility.
How to Determine the Proper Cane Height
The correct cane height should allow your elbow to remain slightly bent, generally around 20 to 30 degrees, while your arm hangs naturally. As a general measurement guide, the top of the cane handle should line up with the crease of your wrist when you are standing upright.
Correct adjustment is important because an incorrectly sized cane can affect both posture and balance.
A cane that is too tall may cause you to raise your shoulder and place extra strain on your arm. A cane that is too short can make you lean forward, which may place additional pressure on your back and neck. The wrist-crease method is a useful way to establish an appropriate starting height.
Step 1: Wear your usual walking shoes.
Measure yourself while wearing the footwear you normally expect to use with the cane because your shoes can affect your standing height.
Step 2: Stand upright.
Keep your shoulders relaxed and look straight ahead while maintaining your normal posture.
Step 3: Allow your arms to rest naturally.
Let both arms hang comfortably beside your body without bending your elbows or lifting your shoulders.
Step 4: Measure from the floor to your wrist crease.
Have another person measure from the floor to the prominent crease on the inside of your wrist. This gives you a useful estimate of the cane’s overall height from the ground to the handle.
If you are adjusting an adjustable cane yourself, use your elbow position as an additional check. Place the cane approximately six inches away from your foot and hold its handle naturally. Your elbow should have a comfortable bend of about 20 to 30 degrees. This slight bend allows your arm to absorb movement while giving you useful leverage without locking your elbow.
Different Types of Canes and Their Benefits
Several cane styles are available, with each offering different levels of support and convenience. The most common options include single-point canes, quad canes, and folding canes.
The right choice depends on your balance, strength, coordination, weight-bearing needs, and daily activities.
Single-point canes are the most familiar type and have one contact point at the bottom. They are generally suitable for people who need a modest amount of support because of minor balance difficulties or discomfort in one joint.
They are lightweight, easy to move, and convenient in narrow areas. They can provide additional confidence while walking and may reduce fatigue. Their main limitation is that they provide less stability than wider-base options and usually cannot remain standing independently.
Quad canes, sometimes called four-point canes, have a wider base with four small feet. This design creates a larger area of contact with the floor and provides greater stability than a traditional single-point cane.
They may be useful for people who require more support or need to place considerable weight through their cane, including some individuals recovering from surgery or dealing with substantial weakness on one side. A quad cane can also remain upright without being leaned against something. However, its larger base makes it heavier and less convenient, particularly when navigating stairs or uneven surfaces. All four feet also need to make secure contact with the ground.
Folding canes are generally based on a single-point design but contain joints that allow them to collapse into a smaller form.
Their biggest advantage is portability. They can be placed inside a bag, purse, or vehicle and are convenient for people who only occasionally need additional support. However, the folding joints may make them feel less solid than a conventional one-piece cane.
The handle is another important consideration. Common handle designs include traditional T-shaped handles, offset handles that position body weight more directly over the cane shaft, and ergonomic palm-style grips intended to reduce pressure on the hand.
How to Properly Walk With a Cane for Maximum Support
For proper cane walking technique, hold the cane in the hand opposite your weaker or injured leg. Move the cane forward together with the weaker leg, then follow with your stronger leg. This three-part pattern helps create a wider support base and reduces some of the stress placed on the affected side.
Correct technique can make walking feel more natural and coordinated. It may also help reduce unnecessary limping and conserve energy. Learning the correct hand position and step sequence is therefore essential.
Which Hand Should You Hold a Cane In?
A cane should generally be held on your stronger side, opposite the weaker, painful, or injured leg. Although this may initially feel unusual, it works with the body’s natural walking mechanics.
When people walk normally, their arms and legs move in opposite patterns. Your right arm naturally moves with your left leg, while your left arm works with your right leg. Using the cane on your stronger side follows this same coordination.
For example, if your left leg is affected, hold the cane in your right hand. As you move your left leg forward, move the cane forward as well. Your stronger arm can then help support some of your body weight.
Using the cane on the opposite side also helps provide support across a wider area of your body. It can reduce stress on the painful hip, knee, or ankle and encourage a smoother walking pattern.
By comparison, placing the cane on the same side as the weaker leg can bring the two support points too close together. This may encourage awkward leaning and can make your posture less stable.
What Is the Correct Walking Pattern With a Cane?
The basic walking sequence is straightforward:
- Move the cane forward.
- Move the weaker or injured leg forward.
- Bring the stronger leg forward past the cane.
This pattern provides multiple points of contact with the ground and helps create a more stable walking rhythm.
Step 1: Move the Cane Forward.
Hold the cane in the hand opposite your weaker leg. Move it forward a comfortable distance and place the rubber tip firmly and flatly on the floor. Avoid reaching excessively far because this can make you less stable.
Step 2: Move the Weaker Leg Forward.
Once the cane is secure, move your weaker or injured leg forward until it is approximately level with the cane. You can apply gentle downward pressure through the cane handle to help transfer some weight away from the affected leg.
Step 3: Move the Stronger Leg Forward.
After your cane and weaker leg are stable, bring your stronger leg forward and past them. This completes one cycle of the walking pattern.
While walking, keep your eyes directed ahead instead of constantly looking down at your feet. Maintain an upright posture and avoid bending forward over the cane. With practice, the movement should become smooth and coordinated.
How to Safely Navigate Stairs and Obstacles With a Cane
Stairs require a different technique from ordinary walking. A useful reminder is “up with the good, down with the bad.” When possible, use a handrail in addition to your cane for extra support.
Learning how to sit, stand, climb stairs, and descend stairs correctly can help make everyday movement safer.
The “Up With the Good, Down With the Bad” Rule for Stairs
When going upstairs, lead with your stronger leg. When coming downstairs, lead with your weaker leg and cane.
This approach allows the stronger leg to provide more power when lifting your body upward and gives it a more stable position when you are lowering yourself.
Going Up Stairs: “Up With the Good”
Stand at the bottom of the stairs. If a handrail is available, use it with one hand while keeping the cane in the other. If there is no railing, keep the cane on the side opposite your weaker leg.
Place your stronger leg on the first step and use it to lift your body upward. Then bring your weaker leg and cane onto the same step.
Continue repeating this pattern:
Strong leg → weak leg + cane
Continue until you reach the top.
Going Down Stairs: “Down With the Bad”
When descending, begin with your cane and weaker leg. Stand near the edge of the top step and use a handrail if one is available.
First place the cane on the step below. Then move your weaker leg onto that same step. Once you are supported, bring your stronger leg down to join it.
Repeat:
Cane → weak leg → strong leg
Continue this sequence until you reach the bottom.
How to Manage Sitting and Standing With a Cane
When sitting down, do not depend on the cane as your main support. Instead, use the stable armrests of the chair.
How to Sit Down Safely:
Walk toward the chair and turn around. Slowly back toward it until you feel the front edge of the seat against the backs of your legs. This lets you know you are positioned correctly.
Move the cane somewhere secure, such as against a wall or over the chair’s armrest, or keep it safely in your stronger-side hand.
Reach back and hold the chair’s armrests. If possible, use both hands for support. Bend your knees and lower yourself into the chair slowly and under control.
How to Stand Up Safely:
Move toward the front edge of the chair and place both feet firmly on the floor about hip-width apart. Position your stronger foot slightly behind the weaker one to improve leverage.
Place both hands on the chair’s armrests. Lean slightly forward and push through the armrests while using your stronger leg to help bring your body into a standing position.
Once upright, pause briefly to make sure you are balanced. Pick up your cane, position it correctly, and begin walking once you feel steady.
Common Mistakes and Advanced Considerations for Cane Users
Common cane mistakes include choosing an incorrect height, holding the cane on the wrong side, relying on it too heavily, and overlooking maintenance.
Choosing a cane that suits your physical needs and using an appropriate handle can also make a significant difference in comfort and everyday safety.
Common Cane Usage Mistakes
New cane users can easily develop habits that make the device less effective. One of the most common problems is using a cane that is either too high or too low. Incorrect height can encourage poor posture and contribute to discomfort in the back, shoulders, or neck.
Another common error is holding the cane on the same side as the weaker or injured leg. In most situations, the cane should instead be held on the opposite side to create a broader support base.
You should also avoid placing excessive weight on the cane. It is intended to provide balance and assistance rather than function as a complete replacement for your ability to bear weight.
Looking down continuously at your feet or the cane tip is another habit to avoid. Keeping your eyes ahead allows you to identify obstacles and maintain a more natural posture.
To improve your technique, make sure the cane handle is positioned around the level of your wrist crease when your arm is naturally relaxed. Keep the cane on the side opposite your weaker leg, maintain an upright posture, and look ahead while walking.
Is Using a Cane Better Than Using a Walker?
The choice between a cane and a walker depends on the person’s balance, strength, weight-bearing ability, and overall mobility needs.
A cane can be useful for someone who needs limited balance assistance or has mild weakness on one side. It also allows greater freedom of movement and can be easier to use in narrow areas, on stairs, or while using public transportation.
A walker, however, provides a broader base and more points of contact with the ground. It may be more appropriate for people who have substantial balance difficulties, weakness affecting both legs, or specific weight-bearing restrictions after surgery.
The Best Cane Grips for Hand Conditions Like Arthritis
People with arthritis, carpal tunnel symptoms, or reduced hand strength may find a narrow traditional cane handle uncomfortable because pressure becomes concentrated in a small area.
Ergonomic handles are designed to distribute pressure more evenly across the hand and palm. This can make holding the cane more comfortable.
An offset handle positions the user’s weight more directly over the cane shaft and may provide good stability. A palm grip is shaped to provide broader contact across the hand and can reduce concentrated pressure points.
For people who simply want additional cushioning, larger foam or gel-padded handles can provide a softer gripping surface and may be easier to hold.
Selecting a comfortable grip is especially important when the cane will be used frequently. A properly designed handle can reduce pressure on the fingers and wrist and make the device easier to use consistently.
How to Maintain Your Cane for Long-Term Safety
Regular cane maintenance is important because worn or damaged components can reduce traction and stability.
The rubber tip, also called the ferrule, deserves particular attention. It creates contact with the floor and helps prevent slipping. Inspect it regularly for cracks, holes, thinning, or worn tread.
If the tread becomes smooth or the rubber is damaged, replace the tip rather than continuing to use it.
Adjustable and folding canes also require additional checks. Make sure adjustment mechanisms, locking pins, collars, and folding joints are secure and functioning properly.
Inspect the shaft from time to time for cracks, dents, or other structural damage. This is especially important if the cane has been dropped or exposed to a strong impact.
A simple maintenance routine can include checking the rubber tip regularly, replacing worn or brittle rubber, confirming that all adjustment points are locked securely, and inspecting the cane body for visible damage.
FAQs
1. Do You Use a Cane on the Injured Side or the Opposite?
A cane should generally be used on the side opposite the injury, weakness, or painful leg. For example, if your left knee or hip is affected, the cane would normally be held in your right hand.
Although using the cane next to the painful side may seem logical, the opposite-side position works more closely with natural walking mechanics. It also allows the cane to provide support as the affected leg moves forward.
2. Does a Cane Go on Your Stronger or Weaker Side?
The cane should generally be held on your stronger side. Your stronger arm and hand can provide better control of the cane and help maintain stability while walking.
Using the cane opposite the weaker leg also creates a wider support arrangement and allows the cane and affected leg to work together during each step.
3. Which Foot Goes First When Using a Cane?
Your weaker or injured foot should move forward together with the cane. Once both are securely positioned, your stronger foot can move forward past them.
This sequence provides a consistent rhythm and allows the cane to assist with support while the affected leg is taking a step.
4. Do You Move the Cane Before Taking a Step?
Yes. Begin each sequence by moving the cane forward a comfortable distance. Place its tip securely on the ground