
Thyroid Biopsy: 7 Things to Expect Before and After a Thyroid Biopsy
A thyroid biopsy is one of the most common tests doctors use to evaluate a thyroid nodule or an unusual spot on the thyroid gland. In most cases, this is done through fine-needle aspiration a minimally invasive technique that draws out a tiny sample of cells with a very thin needle. A pathologist then studies the sample under a microscope to figure out whether the nodule is benign, suspicious, or cancerous. The word “biopsy” can sound scary at first, but the reality is that most thyroid biopsies are short, low-impact, and don’t keep you from getting on with your day.
Knowing what’s coming before and after the procedure takes a lot of the anxiety out of it. Your doctor will typically go over your ultrasound findings, your health history, any medications you’re on, your bleeding risk, and possible allergies before scheduling the biopsy. Ultrasound imaging is usually used to guide needle placement during the test itself, and afterward it’s normal to feel some soreness, mild bruising, or pressure at the site. Below are seven things worth knowing about the lead-up to and the recovery from a thyroid biopsy.
What Should You Expect Before a Thyroid Biopsy?
Getting ready for a thyroid biopsy involves a thorough prep stage: an initial consultation to review your medical background, plus clear guidance on adjusting medications or diet beforehand. This groundwork exists to keep you safe, make the sample as accurate as possible, and give you a chance to ask questions before biopsy day arrives. In short, your care team is checking your health status, walking you through the procedure, and flagging anything like certain medications that could get in the way of a smooth test or recovery.
This prep period really comes down to two pieces. The first is an in-depth conversation with your provider, who reviews your medical background and explains exactly what to expect. The second is following specific pre-biopsy instructions, which matter for both safety and comfort. Both pieces work together to set you up for a good outcome.
1. Initial Consultation, Risk Mapping, and Informed Consent
Before the biopsy itself, you’ll sit down for a detailed consultation and medical review usually with an endocrinologist or an interventional radiologist. This conversation exists to line up your safety needs with the clinical goals of the biopsy before anyone picks up a needle.
                       [Pre-Biopsy Consultation Goals]
                                      │
       ┌──────────────────────────────┴──────────────────────────────┐
       ▼                                                             ▼
[Medical History & Anatomic Mapping]               [Comprehensive Medication Audit]
- Reviews prior neck surgery/radiation             - Coordinates safe blood-thinner pauses
- Checks bleeding disorders & heart health          - Flags risky over-the-counter drugs
- Sets real-time ultrasound landmarks               - Defines "stop" and "restart" windows
A close look at your medical history. Your physician will dig into your health background, watching for anything that could affect the biopsy, such as:
- Previous surgery on the neck or upper airway
- A history of radiation therapy to the head, neck, or chest
- Known bleeding disorders or active heart conditions
This review lets the specialist map out your neck’s anatomy on ultrasound ahead of time, which lowers the odds of accidentally hitting a blood vessel.
Walking through the procedure and answering questions. Your specialist will describe exactly what will happen: how you’ll be positioned, how ultrasound will guide the needle in real time, and what sensations to expect along the way.
This is also your moment to ask about turnaround time for pathology results, or to voice concerns like whether a thyroid biopsy is actually dangerous. Your care team will reassure you that, despite how the word “biopsy” sounds, this is a routine, low-risk test with a very low complication rate.
Signing off with informed consent. Once your questions are answered, you’ll review and sign an informed consent form. This document spells out the benefits, alternatives, and rare risks of a thyroid needle biopsy things like minor bleeding or infection. Signing it confirms you understand why the test is needed and that you’re agreeing to move forward.
2. Pre-Procedural Hemostasis Management: Medications and Supplements
Most pre-biopsy instructions exist for one reason: protecting your body’s natural clotting ability, or hemostasis. Getting this right lowers your odds of a post-biopsy hematoma a pocket of blood in the neck tissue that can hurt or, in rare cases, press on the airway.
[Unmanaged Antiplatelet / Anticoagulant Use] ──► Bleeding at the Puncture Site ──► Neck Hematoma Pressing on Airway
Adjusting blood thinners and antiplatelet drugs. Changing your blood-thinner routine has to be coordinated between the doctor doing the biopsy and whoever prescribed the medication in the first place. How far ahead you pause depends on the drug class:
| Drug Type | Common Examples | Typical Pause Before Biopsy | Why It Matters |
|---|---|---|---|
| OTC NSAIDs | Aspirin, ibuprofen, naproxen | 3–7 days | Reduces platelet clumping, raising bruising risk |
| Traditional anticoagulants | Warfarin (Coumadin) | 4–5 days | Affects vitamin K–dependent clotting factors; needs INR checks |
| Targeted antiplatelets | Clopidogrel (Plavix) | 5–7 days | Blocks the P2Y12 receptor pathway that helps platelets clot |
| Direct oral anticoagulants | Apixaban (Eliquis), rivaroxaban | 48–72 hours | Blocks factor Xa directly; clears the body quickly |
Important: Never stop or change a prescription blood thinner on your own. That decision always needs to come from your doctor, since stopping too abruptly could raise your risk of a stroke or blood clot elsewhere in the body.
Supplements and diet. A number of common supplements have blood-thinning effects that can raise bleeding risk during the biopsy. Doctors usually recommend pausing high-dose vitamin E, fish oil, garlic supplements, ginseng, and ginkgo biloba about a week beforehand.
Eating and drinking beforehand. For a standard needle biopsy done under local anesthesia, there’s no need to fast. Since the digestive system isn’t involved and your airway reflexes stay fully intact, you can eat and drink normally right up to your appointment.
The one exception is if you have significant needle anxiety and need IV sedation. In that case, your team will give you specific fasting instructions typically no food or drink for six to eight hours beforehand.
What Happens During the Thyroid Biopsy Procedure?
During the biopsy itself, you can expect a structured, ultrasound-guided process: a specialist numbs the area with local anesthetic, then uses a very thin needle to draw cell samples from the nodule. The whole thing moves quickly and is built around keeping you comfortable, while ultrasound guidance keeps it precise.
Here’s a closer look at how the procedure unfolds step by step, along with a realistic sense of what it actually feels like both of which can go a long way toward easing needle-related nerves.
1. Operational Real-Time Flow: The Guided Procedure
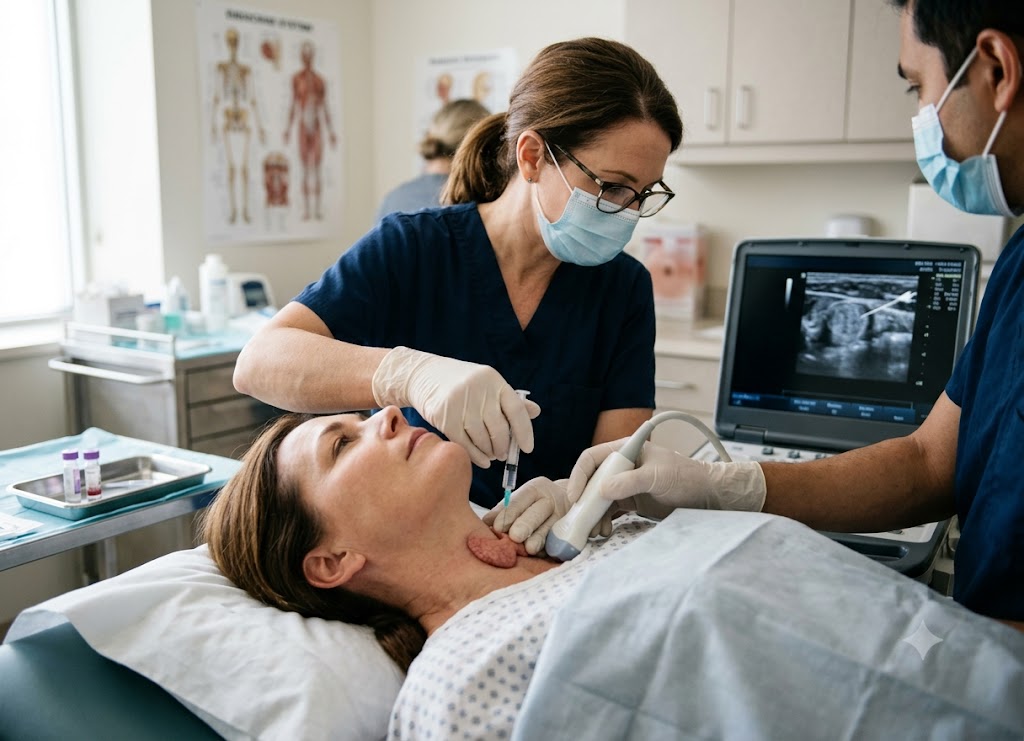
A thyroid biopsy is a precise, ultrasound-guided outpatient test built to collect cells from a targeted nodule. If you’ve wondered exactly how doctors perform a thyroid biopsy, here’s the clinical flow, start to finish usually 15 to 30 minutes total.
[1. Positioning] ──► [2. Sterilizing the Skin] ──► [3. Numbing the Area] ──► [4. Ultrasound Guidance] ──► [5. Collecting the Sample] ──► [6. Applying Pressure]
Step 1 : Getting positioned.
You’ll lie flat on your back with a rolled towel or firm pillow under your shoulders, tilting your head back slightly. This brings the thyroid forward, giving the doctor better access to the nodule. You’ll be asked to stay still and avoid talking or swallowing while the needle is in place.
Step 2 : Cleaning the skin.
The front of your neck, right over the thyroid, gets cleaned thoroughly with an antiseptic like chlorhexidine or iodine, which lowers infection risk.
Step 3 : Numbing the area.
A small amount of local anesthetic, usually lidocaine, is injected into the skin and tissue where the needle will go. Expect a brief sting or burning feeling similar to a dental injection that fades quickly once the area is numb.
Step 4 : Mapping the path with ultrasound.
Using a handheld ultrasound probe on your neck, your doctor gets a live image of the thyroid and the nodule in question. The gel helps the sound waves transmit clearly. This real-time view is what makes the needle placement accurate and helps avoid nearby blood vessels.
Step 5 : Drawing the sample.
Watching the ultrasound screen, the doctor guides a very thin, hollow needle thinner than what’s used for a blood draw into the nodule. Small, quick back-and-forth movements collect cells and fluid. You’ll likely feel pressure rather than sharp pain. This usually happens two to six times across different spots in the nodule to get a good sample, with each pass lasting just seconds.
Step 6 : Pressure and bandaging.
Once sampling is done, the needle comes out and firm pressure is applied for a few minutes to control bleeding. A small adhesive bandage goes over the site no stitches needed.
2. Sensory Analysis: Managing Discomfort Expectations
A lot of patients assume a thyroid biopsy will hurt. In practice, local anesthetic numbs the skin and surrounding tissue well enough that most people describe the experience as pressure, not pain and whatever discomfort there is tends to be mild and brief.
                          [Sensory Experience Timeline]
                                        │
        ┌───────────────────────────────┴───────────────────────────────┐
        ▼                                                               ▼
[The Numbing Injection]                                  [Pressure During Sampling]
- A quick sting from a fine needle                       - No sharp pain through numbed skin
- Brief burning as the area numbs                        - A dull, deep ache as the needle moves
- Feels similar to a dental injection                     - Managed by not swallowing for 10–15 sec
The numbing shot. For most people, this is the most noticeable moment of discomfort a quick pinch or sting lasting just a few seconds, sometimes with a brief burning sensation as the anesthetic kicks in. It’s comparable to a numbing injection at the dentist and is usually the peak of the whole experience.
During sample collection. Once numb, you shouldn’t feel the needle piercing your skin. As it moves within the nodule, expect pressure, pushing, or a dull ache rather than sharp pain the thyroid itself has relatively few pain-sensing nerves, which is part of why this test is so well tolerated. You’ll be asked to hold still and avoid swallowing for those few seconds.
Afterward. Once the numbing wears off, mild soreness is common similar to the ache you’d get after a vaccination. Over-the-counter acetaminophen (Tylenol) usually handles it, and the discomfort typically fades within a day or two. An ice pack can also help cut down on soreness and bruising.
3. Comparative Analysis: Fine Needle vs. Core Needle Techniques
Fine-needle aspiration handles the vast majority of thyroid evaluations, but some complex or heavily calcified nodules call for a core needle biopsy instead.
[Fine-Needle Aspiration] ──► Pulls individual cell clusters (cytology)
[Core Needle Biopsy]     ──► Pulls an intact tissue core (histology)
Fine-Needle Aspiration (FNA): Uses an ultra-thin needle typically 22 to 27 gauge, finer than a standard blood-draw needle to collect fluid and loose cells for cytology. It’s the go-to choice for most nodules because it’s minimally invasive.
Core Needle Biopsy (CNB): Uses a slightly larger cutting needle, usually 18 to 21 gauge, to remove an intact cylinder of tissue for histology. Doctors reach for this when an FNA comes back inconclusive or a nodule is too firm and fibrous for loose cells to come out easily. It involves more pressure and slightly more bruising risk, but gives a fuller picture of the tissue’s structure.
What is the Recovery Process Like After a Thyroid Biopsy?
Recovery from a thyroid biopsy tends to be quick and uneventful minimal downtime, manageable side effects, and a follow-up appointment to go over results. Most people are back to their normal routine almost right away, with just a few aftercare steps to follow for the first day or two. The main goals during recovery are staying comfortable, avoiding minor complications like bruising, and eventually getting a clear answer about what the nodule is.
Recovery breaks down into three parts: the immediate aftercare instructions you’ll get before leaving, managing the small, common side effects, and finally receiving your results and understanding what happens next.
1. Comprehensive Post-Procedure Aftercare Protocol
Right after the biopsy, the focus shifts to protecting the tiny puncture site, keeping swelling down, and letting blood pressure in the neck’s vessels settle. Because the needle only creates a small, focused puncture through skin and the thin tissue layers underneath, recovery at home tends to be simple. Sticking to a few basic steps helps avoid rare issues like a deeper hematoma or skin infection.
                     [The 48-Hour Recovery Protocol]
                                    │
       ┌────────────────────────────┼────────────────────────────┐
       ▼                            ▼                            ▼
[Caring for the Puncture]     [Using Cold Therapy]         [Limiting Activity]
- Keep bandage dry 24 hrs     - Ice 15–20 min at a time    - Skip lifting over 10 lbs
- Shower gently after that    - Wrap ice in a thin towel   - Hold off on intense workouts
- Let skin air-dry            - Helps limit minor bleeding - Keep heart rate steady
Caring for the bandage and puncture site. Right after the biopsy, your doctor applies firm pressure to the neck for a few minutes, then places a small adhesive bandage over the puncture.
Keep the bandage dry and in place for the rest of the day ideally a full 24 hours so the tiny needle tract has time to close up securely.
After 24 hours, you can remove the bandage and let the skin breathe. Showering and gently washing the area with mild soap and water is fine; just pat it dry afterward.
Because the puncture is so small, there’s no need for antibiotic ointment, alcohol, or special dressings.
Using cold therapy. Applying cold to the front of your neck during the first day is one of the best ways to limit swelling, bruising, and fluid buildup.
Use an ice pack or gel cold pack on the site for 15 to 20 minutes at a stretch, repeating every few hours through the rest of the day.
Always wrap the ice pack in a thin towel before it touches your skin, so you avoid any risk of an ice burn.
Cold causes the small blood vessels around the thyroid to narrow, which limits how much blood can leak into the surrounding tissue reducing the chance of a visible bruise.
Limiting activity. While you can drive yourself home and get back to desk work right away, it’s best to avoid intense physical activity for 24 to 48 hours.
Skip strenuous exercise, high-impact workouts, running, competitive sports, and lifting anything heavier than about 10 pounds groceries, luggage, gym equipment, and the like.
These activities raise blood pressure and heart rate, and that extra pressure in the neck’s blood vessels can disturb the clot still forming at the puncture site, potentially leading to internal bleeding.
Light walking, gentle daily tasks, and normal household activity are all fine and even encouraged during this stretch.
2. Sensory Profiles and Emergency Complications
Feeling some soreness once the numbing wears off is a normal part of healing. Knowing what’s expected versus what needs urgent attention helps you manage recovery confidently.
                       [Post-Biopsy Tissue Tracking]
                                     │
       ┌─────────────────────────────┴─────────────────────────────┐
       ▼                                                           ▼
[Normal, Expected Symptoms]                          [Warning Signs to Watch For]
- Dull ache that may reach toward the ear             - Rapidly growing neck swelling
- Bruising shifting from purple to yellow             - Worsening trouble breathing/swallowing
- A small, stable, firm lump under the skin           - Fever, chills, or pus at the site
Managing normal soreness. A dull, muscle-like ache over the thyroid is the most common after-effect, sometimes reaching up toward the jaw or ear on the same side. It usually peaks in the first 24 hours. Acetaminophen (Tylenol) is the go-to for relief; it’s best to hold off on aspirin, ibuprofen (Advil, Motrin), or naproxen (Aleve) for the first day unless your doctor says otherwise, since these can slightly increase bruising.
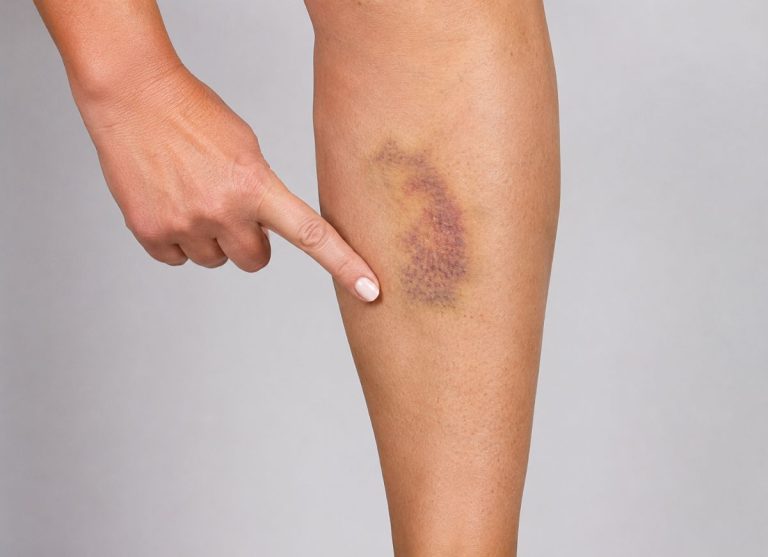
Bruising. A small bruise may show up around the puncture within the first day or two. It’ll change color over about a week moving from blue or purple to green and yellow as your body reabsorbs the trapped blood.
A small, firm lump. You might notice a tiny, marble-like bump right at the puncture site usually just a small, contained collection of blood. As long as it stays small and stable rather than growing, it’s nothing to worry about; your body typically reabsorbs it over one to two weeks.
When to seek emergency care. Major complications from a thyroid biopsy are rare, but because important blood vessels and the windpipe sit close to the thyroid, it’s worth knowing the red flags. Get medical attention right away if you notice:
- Swelling that’s rapidly getting worse, visible distortion of your neck, or a tight, pressured feeling in your throat
- New or worsening trouble breathing, a sense of airway tightness, or difficulty swallowing saliva or liquids
- Sudden or worsening hoarseness, or trouble speaking that gets worse over a few hours
- Fever, chills, or increasing redness, warmth, swelling, or pus at the puncture site
3. Pathological Classifications and Diagnostic Pathways
Once collected, your cell samples are placed on slides, stained, and examined under a microscope by a cytopathologist. This takes time to do properly full results are typically ready within a few days to two weeks.
[Fine-Needle Aspiration Cytology]
   │
   ├─► Class I: Non-Diagnostic (5–10%) ───────► Repeat Ultrasound-Guided FNA
   ├─► Class II: Benign (60–70%) ──────────────► Long-Term Ultrasound Monitoring
   ├─► Class III/IV: Indeterminate (15–20%) ───► Molecular/Genetic Testing
   ├─► Class V: Suspicious (5–10%) ────────────► Surgical Lobectomy
   └─► Class VI: Malignant (5–10%) ────────────► Total Thyroidectomy / Cancer Treatment
Results are communicated using a standardized six-tier framework called the Bethesda System for Reporting Thyroid Cytopathology. Each category carries its own cancer risk and recommended next step:
Bethesda Class I Non-Diagnostic or Unsatisfactory. The sample didn’t contain enough follicular cells for a confident read often due to heavy calcification, excess blood, or dense connective tissue. This doesn’t mean the nodule is cancerous; it just means the test wasn’t conclusive. The usual next step is a repeat ultrasound-guided FNA after the tissue heals.
Bethesda Class II Benign. The most common result, making up 60–70% of biopsies, and includes things like colloid nodules and Hashimoto’s thyroiditis. No surgery or treatment is needed just a follow-up ultrasound in 12 to 24 months to keep an eye on the nodule.
Bethesda Class III Atypia/Follicular Lesion of Undetermined Significance. Cells show mild irregularities that don’t clearly point to cancer or a benign process, making up about 10–15% of results. Next steps vary often molecular testing for mutations like BRAF or RAS, a repeat biopsy, or diagnostic surgery.
Bethesda Class IV Follicular Neoplasm or Suspicious for One. The cells are densely packed and can’t be sorted into benign or malignant without examining the full nodule capsule. Typical next steps are molecular testing to estimate risk, or a surgical lobectomy for a definitive answer.
Bethesda Class V Suspicious for Malignancy. Strong cancer-like features are present, but not quite enough to confirm with a 60–75% likelihood of malignancy. This usually leads to a referral to an endocrine surgeon for partial or full thyroid removal.
Bethesda Class VI Malignant. Clear cancer features are present, most often papillary thyroid carcinoma, though follicular, medullary, or anaplastic types are possible too. This leads to a consultation with an endocrine surgery and oncology team, typically followed by a partial or total thyroidectomy, sometimes with nearby lymph node removal.
Some Other Considerations Regarding Thyroid Biopsies
Beyond the test itself, it helps to understand the different biopsy types, the possible risks, and how results get classified all of which shape what happens next, from simple monitoring to more involved treatment.
1. Advanced Diagnostic Modalities: Comparing FNA, Core, and Surgical Biopsies
Which type of biopsy makes sense depends on the nodule’s features on ultrasound and how much structural detail the pathologist needs for a clear answer.
                       [The Diagnostic Spectrum]
                                   │
      ┌────────────────────────────┼────────────────────────────┐
      ▼                            ▼                            ▼
[Fine-Needle Aspiration]    [Core Needle Biopsy]         [Surgical Biopsy]
- 22–27 gauge needle         - 18–21 gauge needle         - Surgical incision
- Loose individual cells     - Intact tissue core         - Full nodule removal
- Cytology screening         - Histology review           - Definitive diagnosis
Fine-Needle Aspiration (FNA): The primary screening tool for thyroid nodules. Using an ultra-fine needle (22–27 gauge), the doctor collects loose cells and fluid, done in-office with local numbing and no stitches needed. Its main limitation is that loose cells can’t reveal a tumor’s overall structure.
Core Needle Biopsy (CNB): Used when FNA results are unclear, this technique uses a slightly larger needle (18–21 gauge) to pull an intact tissue sample, preserving its structure for histological review. It’s especially useful for firm or calcified nodules.
Surgical Biopsy: An open procedure done under general anesthesia in an operating room, removing part or all of the thyroid lobe. It gives a complete, definitive diagnosis but comes with a longer recovery, a hospital stay, and a permanent scar. Doctors typically reserve this for cases where FNA and CNB haven’t given clear answers, or when a nodule looks highly suspicious.
2. Comprehensive Clinical Risk Profile and Anatomical Proximity
A thyroid biopsy is a low-risk procedure overall, but because the thyroid sits right in front of the windpipe and near major blood vessels, it’s worth understanding the range of possible complications.
                    [Anatomical Complication Vector]
                                   │
     ┌─────────────────────────────┼─────────────────────────────┐
     ▼                             ▼                             ▼
[Common Minor Effects]         [Less Common Risks]          [Very Rare Injuries]
- Localized soreness            - Expanding hematoma         - Windpipe puncture
- Surface bruising               - Airway pressure            - Nerve injury
- Mild site swelling             - Infection                  - Lasting hoarseness
Common, minor effects. Most patients experience only mild, short-lived symptoms a dull ache, light bruising, and minor swelling that resolve within a day or two with an ice pack and acetaminophen.
Less common vascular and infection risks. If a small vessel is nicked, blood can collect under the skin as a hematoma. Small ones resolve on their own, but a rapidly expanding one that presses on nearby structures needs urgent care. Infection is uncommon but can show up a few days later as fever, chills, redness, warmth, or pus at the site.
Very rare structural injuries. Ultrasound guidance keeps the risk of misplacement very low, but in rare cases the needle can nick the trachea or esophagus, causing brief coughing or minor bleeding, or come close to the recurrent laryngeal nerve, which controls the vocal cords. Injury here can cause temporary and very rarely, permanent hoarseness.
3. The Bethesda System: Microscopic Classification Criteria
To standardize communication between the lab and your doctor, results are classified using the Bethesda System for Reporting Thyroid Cytopathology.
[Bethesda Cytopathology Scale]
   │
   ├─► Category I   (Non-Diagnostic)  ──► Risk: 1–4%   ──► Repeat FNA
   ├─► Category II  (Benign)          ──► Risk: 0–3%   ──► Ultrasound Monitoring
   ├─► Category III (AUS/FLUS)        ──► Risk: 10–30% ──► Molecular Testing
   ├─► Category IV  (Follicular Neo)  ──► Risk: 25–40% ──► Surgical Lobectomy
   ├─► Category V   (Suspicious)      ──► Risk: 50–75% ──► Near-Total Removal
   └─► Category VI  (Malignant)       ──► Risk: 97–99% ──► Oncological Surgery
Category I: Not enough healthy cells for a reliable read, often from calcification, blood, or a simple fluid-filled cyst. Malignancy risk: 1–4%. Next step: repeat FNA after healing.
Category II: The most common result up to 70% of cases covering non-cancerous findings like colloid nodules or Hashimoto’s thyroiditis. Risk: 0–3%. Managed with routine ultrasound every 12–24 months.
Category III: Cells show mild irregularities that aren’t clearly a tumor. Risk: roughly 10–30%. Next steps are personalized repeat biopsy, molecular testing, or diagnostic surgery.
Category IV: A dense cluster of follicular cells where benign versus malignant can’t be told apart without examining the full capsule. Risk: 25–40%. Usually leads to genetic testing or a lobectomy.
Category V: Strong cancer features present but not fully conclusive. Risk: 50–75%. Typically moves straight to a surgeon for partial or near-total thyroid removal.
Category VI: A definitive cancer diagnosis, most often papillary carcinoma, though other types are possible. Risk: 97–99%. Leads to a total thyroidectomy, often with nearby lymph node removal.
Conclusion
A thyroid biopsy is generally a simple, low-risk procedure, but preparation and aftercare still matter. Beforehand, be ready to talk through your medications, past bleeding issues, allergies, and what different results could mean. Afterward, some mild tenderness, swelling, or bruising is normal, while serious complications are uncommon. If you notice worsening pain, fever, heavy bleeding, breathing or swallowing trouble, or rapidly growing neck swelling after your biopsy, reach out to a healthcare provider right away.
Read more: 7 Causes of Anisocytosis and What They Mean for Your Blood
Frequently Asked Questions
1. What is a thyroid biopsy?
A thyroid biopsy collects cells from a thyroid nodule or unusual area for examination. Fine-needle aspiration, the most common method, uses a thin needle to draw out a small sample, which a specialist then studies under a microscope. Results help determine whether the nodule is benign, suspicious, or requires further treatment.
2. Why might a doctor recommend a thyroid biopsy?
A biopsy is typically recommended when a nodule has suspicious ultrasound features or meets certain size thresholds. It helps determine whether cancer or other abnormal changes are present. Not every nodule needs one many are simply monitored and the decision depends on ultrasound findings, growth, symptoms, risk factors, and thyroid function tests.
3. Does a thyroid biopsy hurt?
Most people find it mildly uncomfortable rather than truly painful a small pinch or brief sting is typical. Local anesthetic is used at many clinics, though some skip it for FNA. Mild soreness or bruising afterward is common and usually fades quickly.
4. What should I do before a thyroid biopsy?
Tell your provider about all medications, supplements, allergies, and any history of bleeding problems. Certain medications, especially blood thinners, may need adjusting beforehand but only under your doctor’s direction. Never stop a prescribed medication without clear guidance from your healthcare provider.
5. What happens after a thyroid biopsy?
The site is typically covered with a small bandage, and you may be observed briefly before heading home. Mild soreness, swelling, or bruising is common. Most people resume normal activities soon after, though strenuous activity is usually best avoided for a short period. Results generally take anywhere from several days to a couple of weeks, depending on the lab and whether additional testing is needed.